

I've got some exciting things to show you. As you might know, Intercity is our home-grown web-based management dashboard for hosting web applications. Intercity is perfect for hosting Ruby on Rails apps and services in the surrounding ecosystem like MySQL/Postgres, Redis, and Memcached. However, you can also use Intercity to host any other framework or language (ie. PHP, Node) since it uses Dokku under the hood.
The second benefit of Intercity is that it lets you host your apps on a server that you control. The ability to host anywhere makes it possible to host on a virtual EC2 instance or DigitalOceandroplet, but it can also be a piece of bare metal in your data center or company network.
I'd like to show you a screenshot tour that illustrates how easy it is to get your app deployed via Intercity.
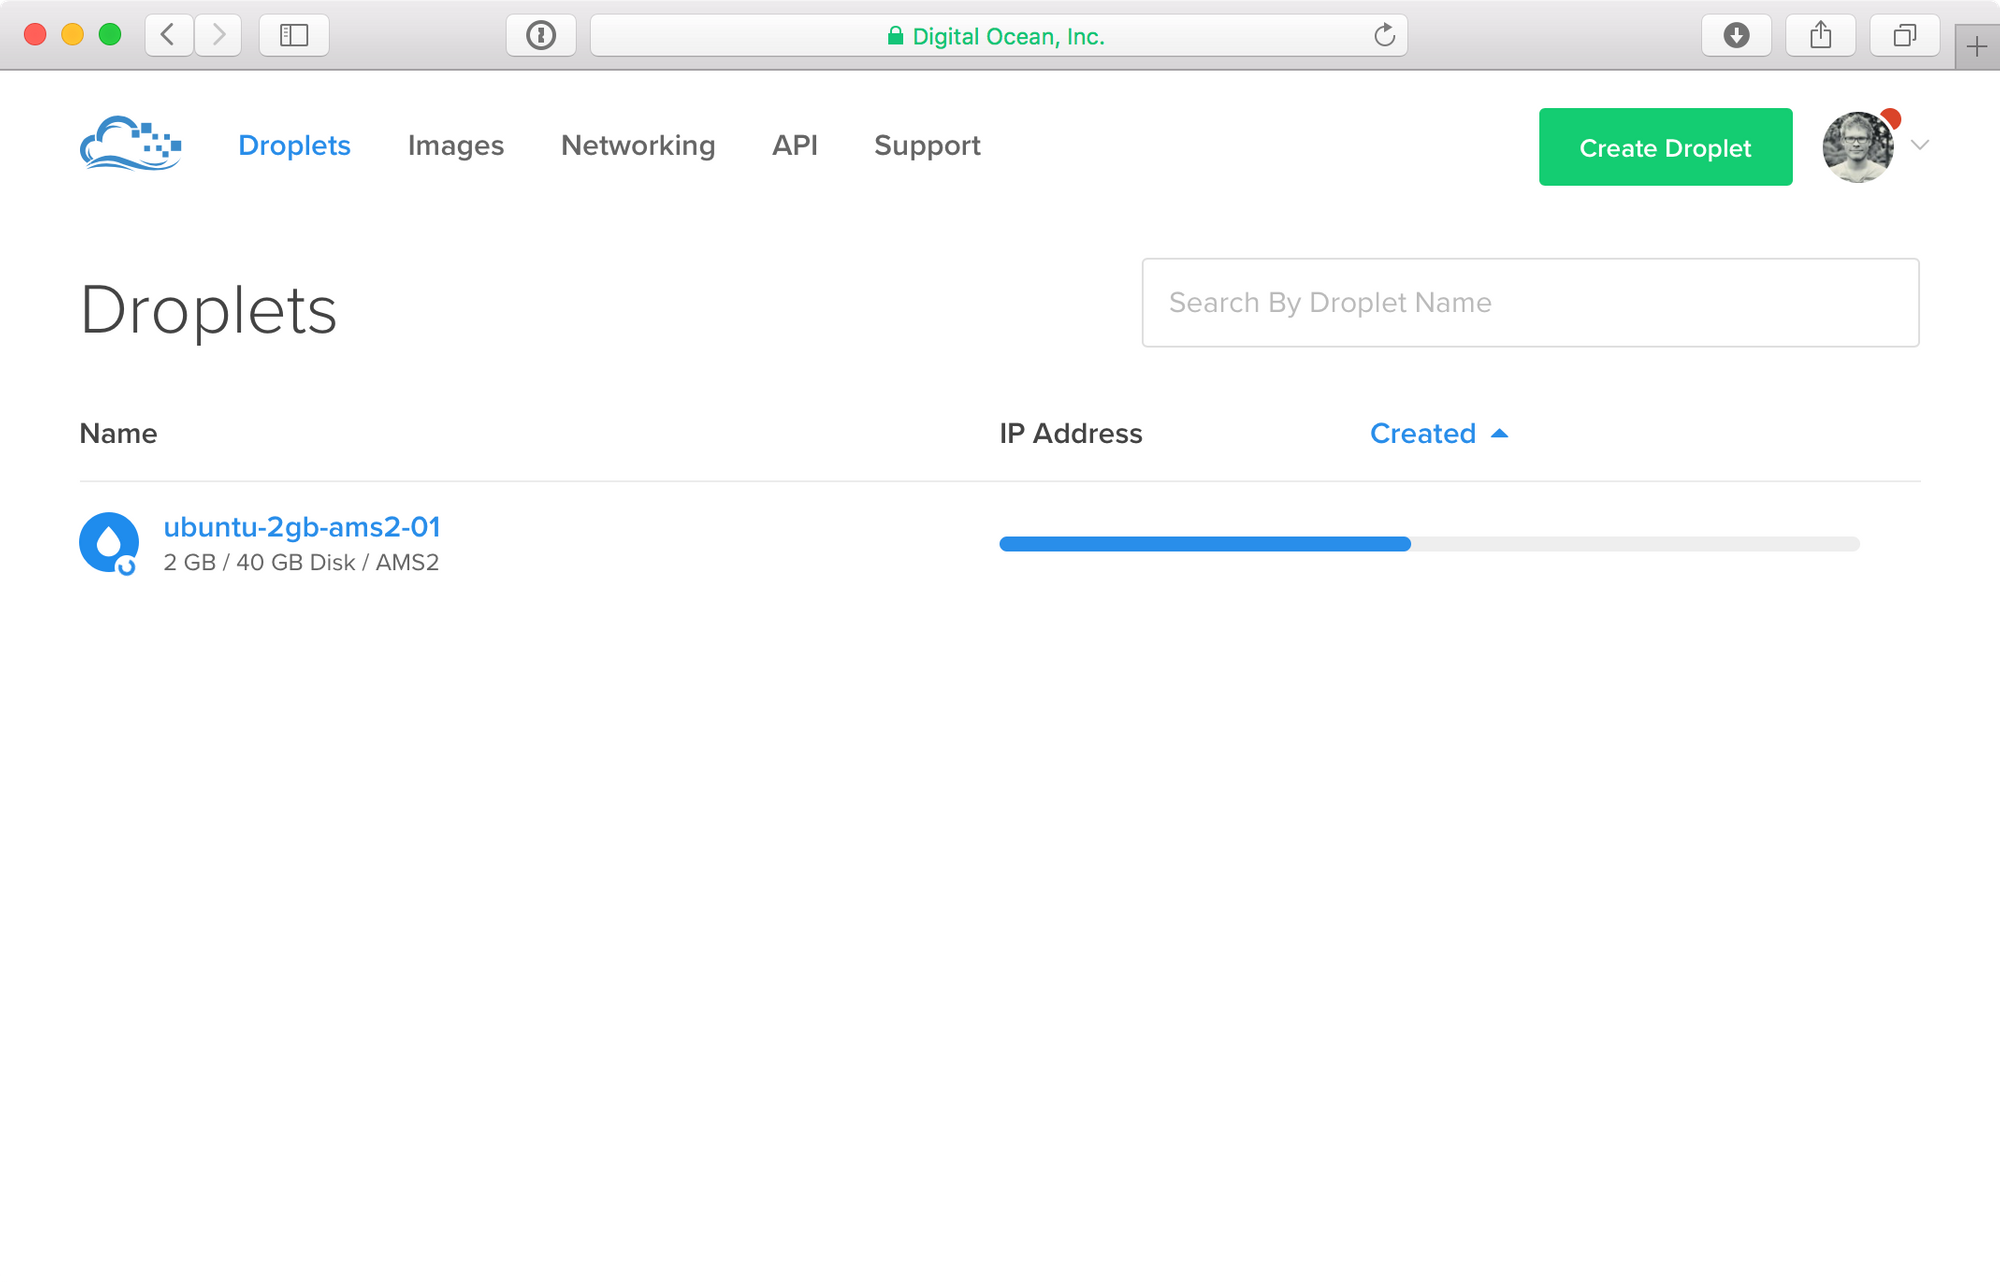
For this, I'll be using a DigitalOcean droplet and our internal deployment of the Intercity dashboard. I've just created an Ubuntu 16.04 (LTS) droplet with 2G of RAM and 2 CPU cores. I've also added my Macbook's SSH key to be inserted into the initial root user.
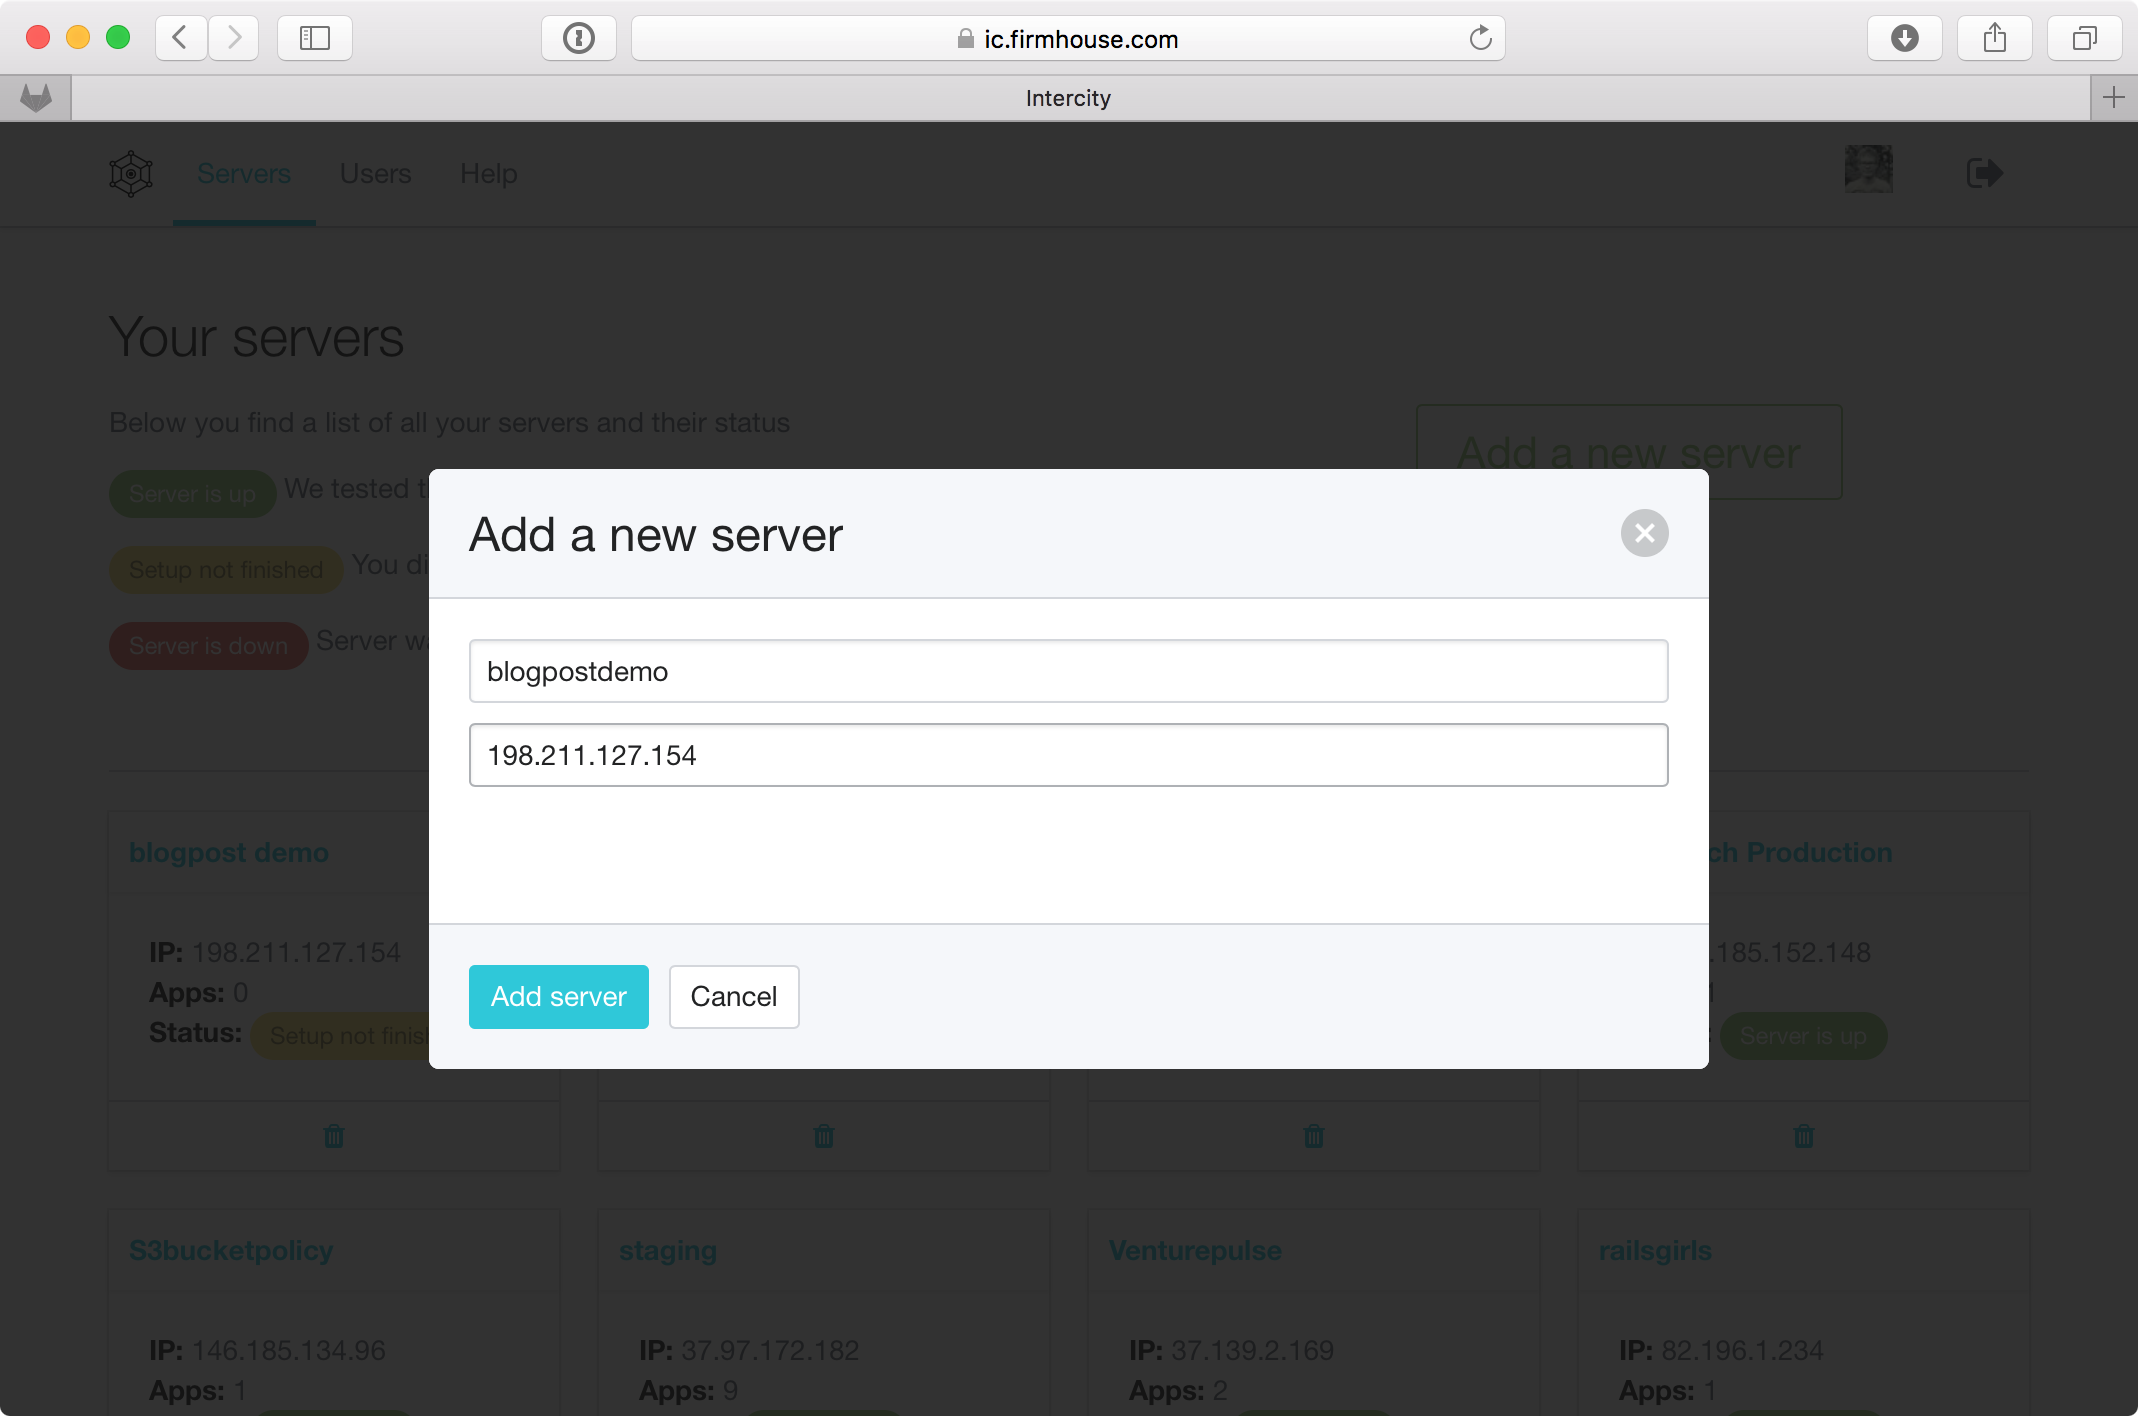
Now, I will add this droplet to our Intercity dashboard, by giving it a name and entering the IP address of the droplet, provided by DigitalOcean.
After that, it's time to connect our Intercity management dashboard to the new droplet, by adding a server-specific SSH key to the root account. Intercity will continually check for the SSH connection and will continue after you've added the SSH key to your server.
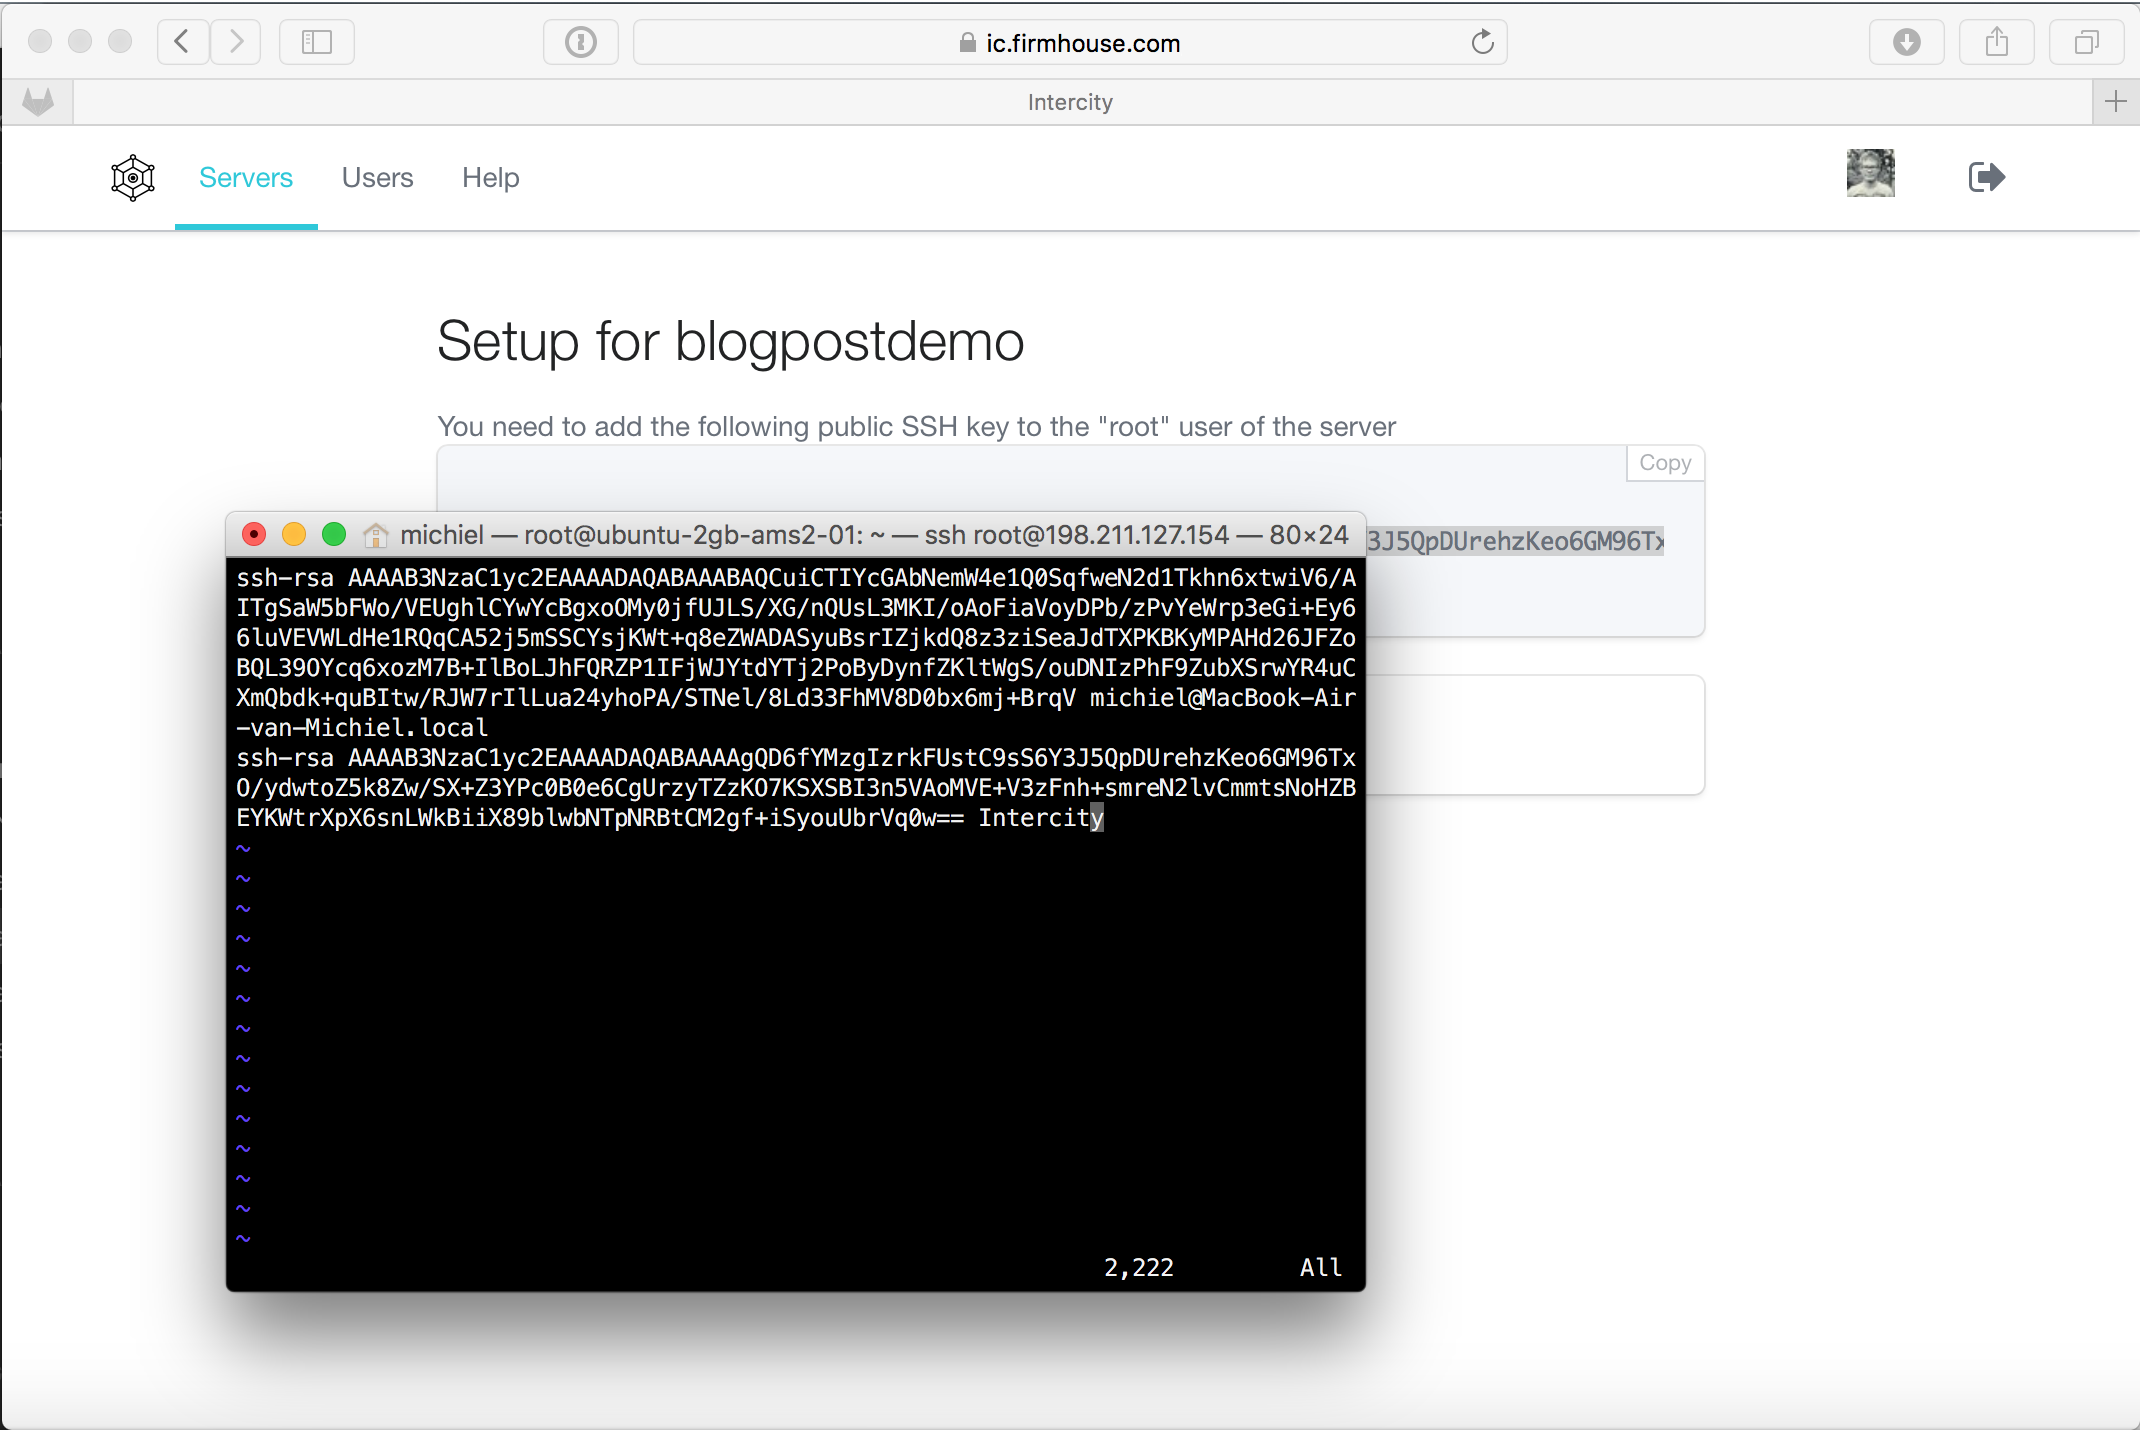
Intercity has picked up the SSH key connection, and will allow you to continue the setup process:
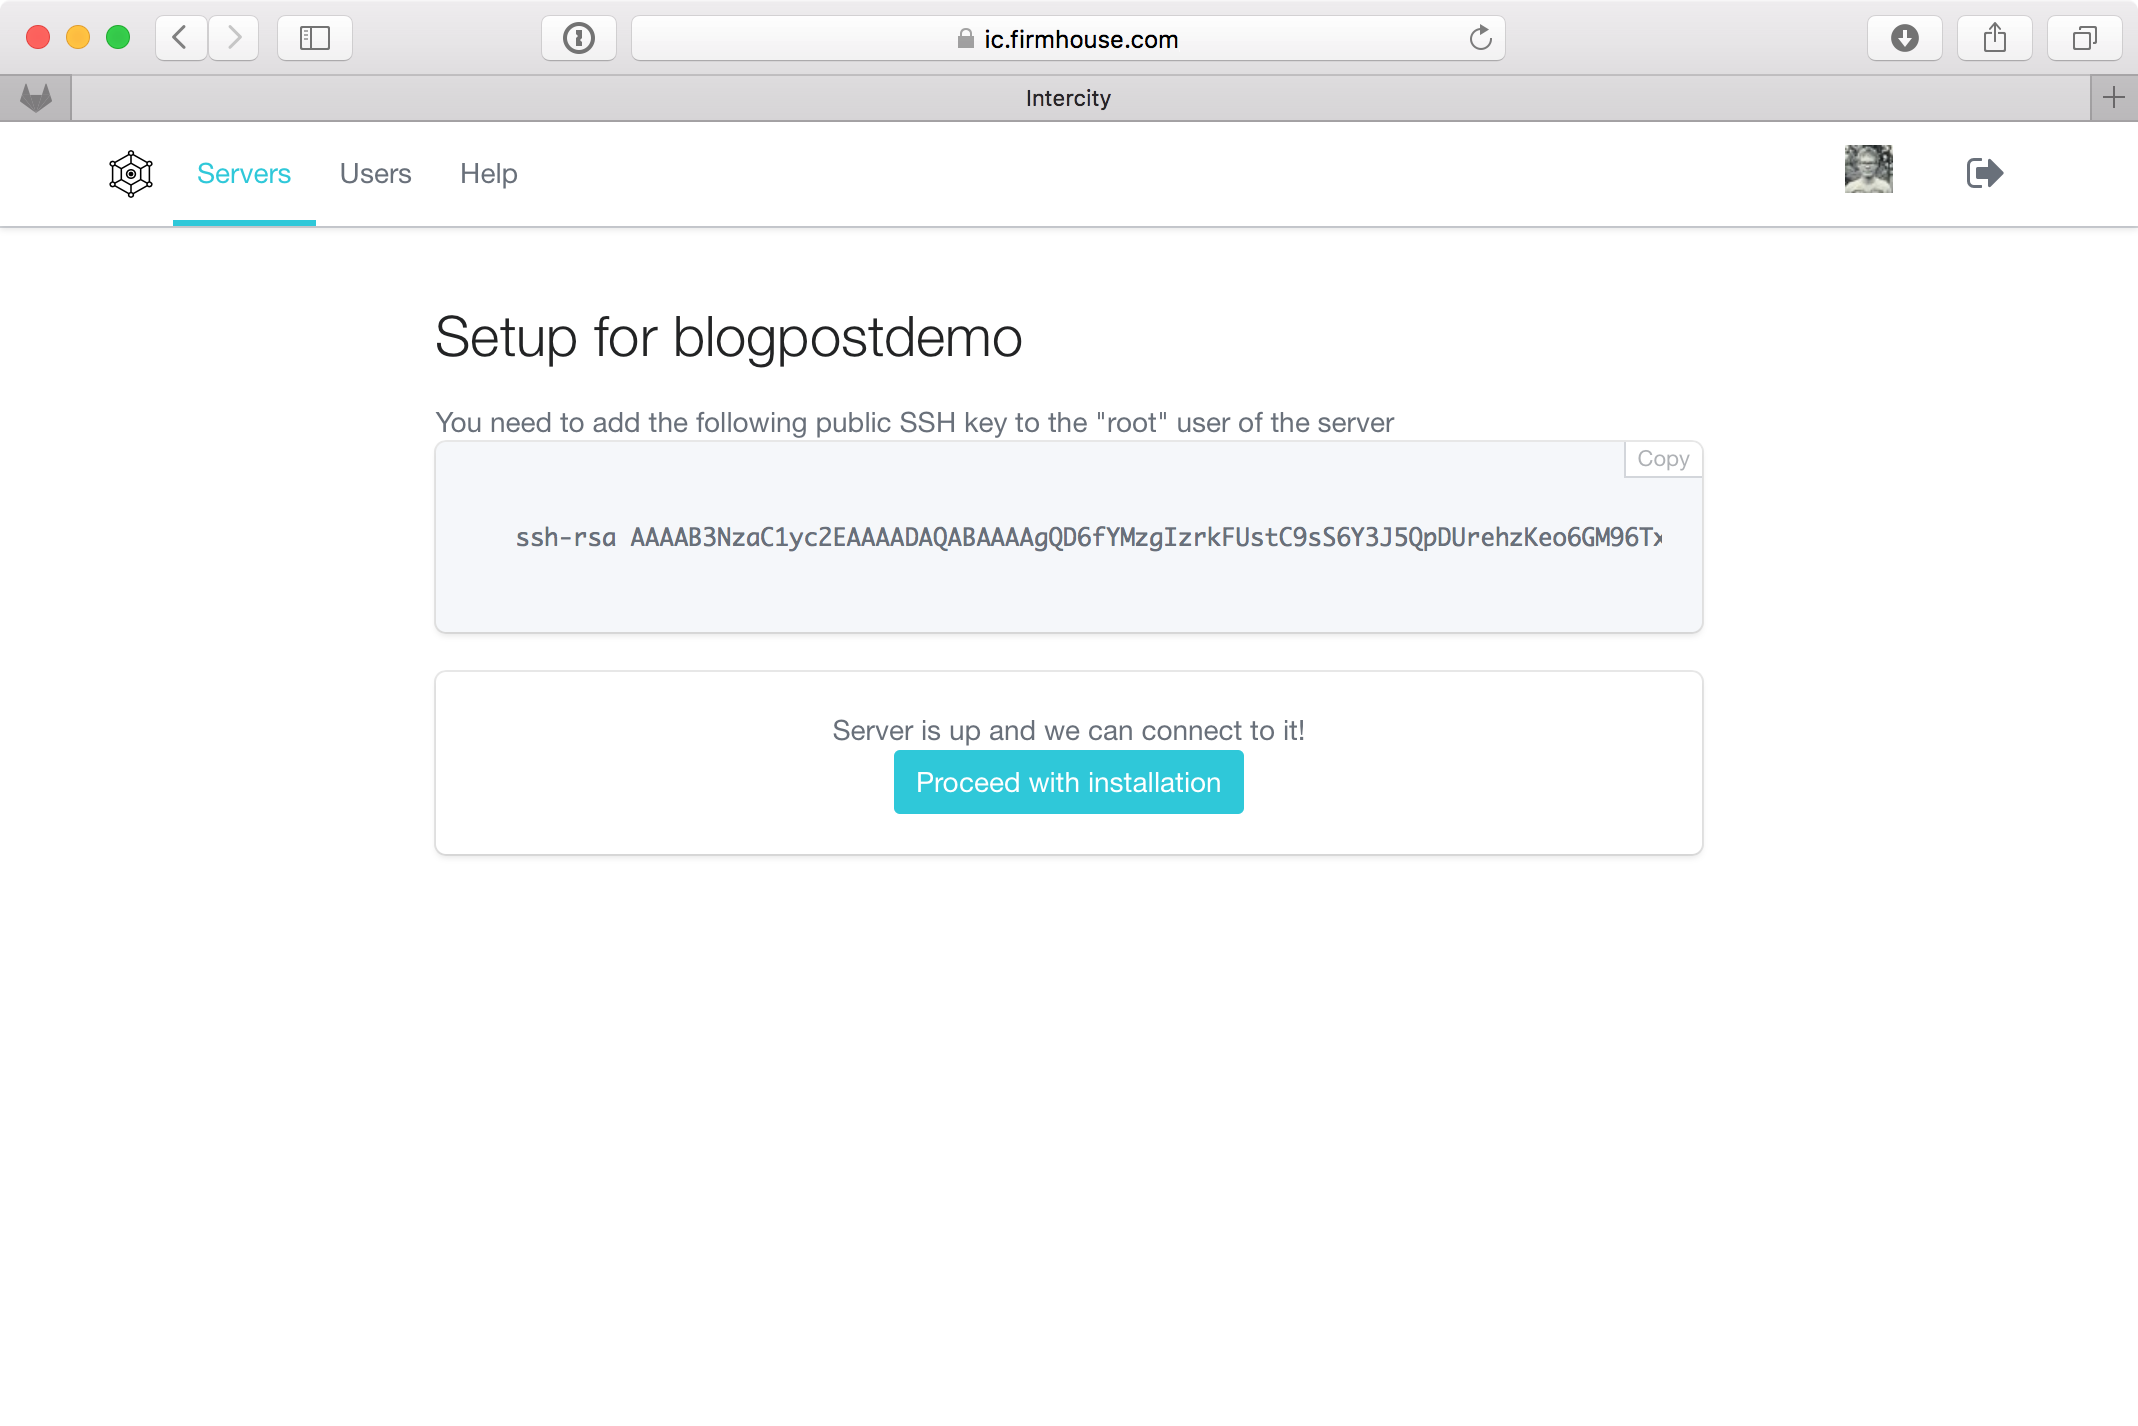
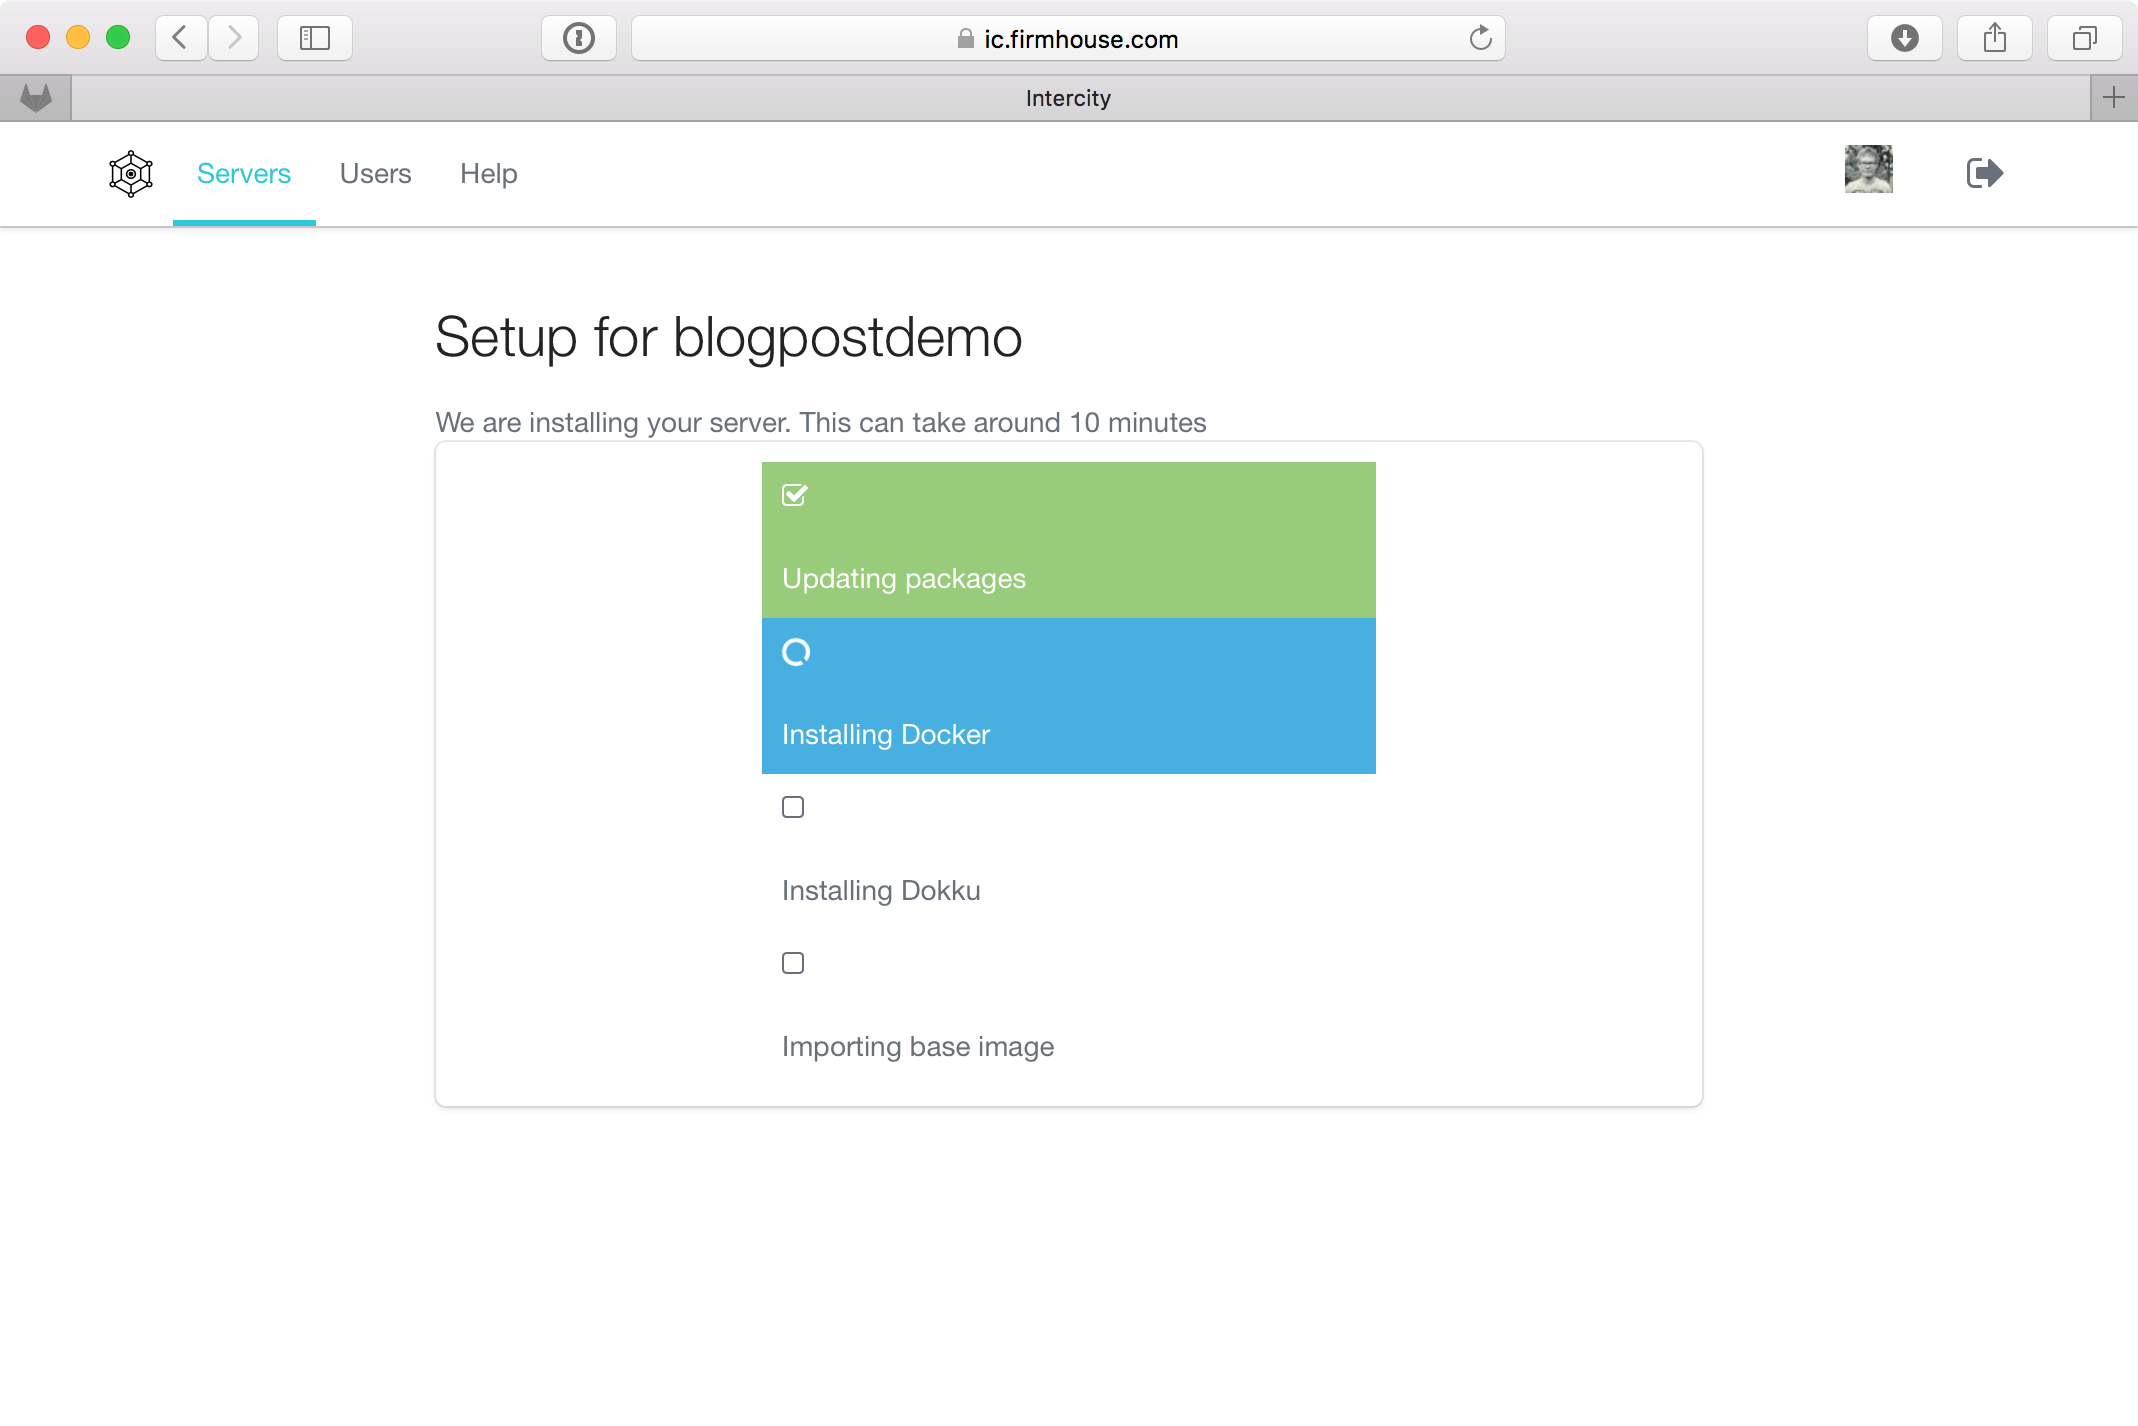
It will then install all required base software for hosting your applications. The following overview screen shows the progress of the installation:
After Intercity installs the requirements on your server, you get presented with a screen to continue so you can start setting up your first app:
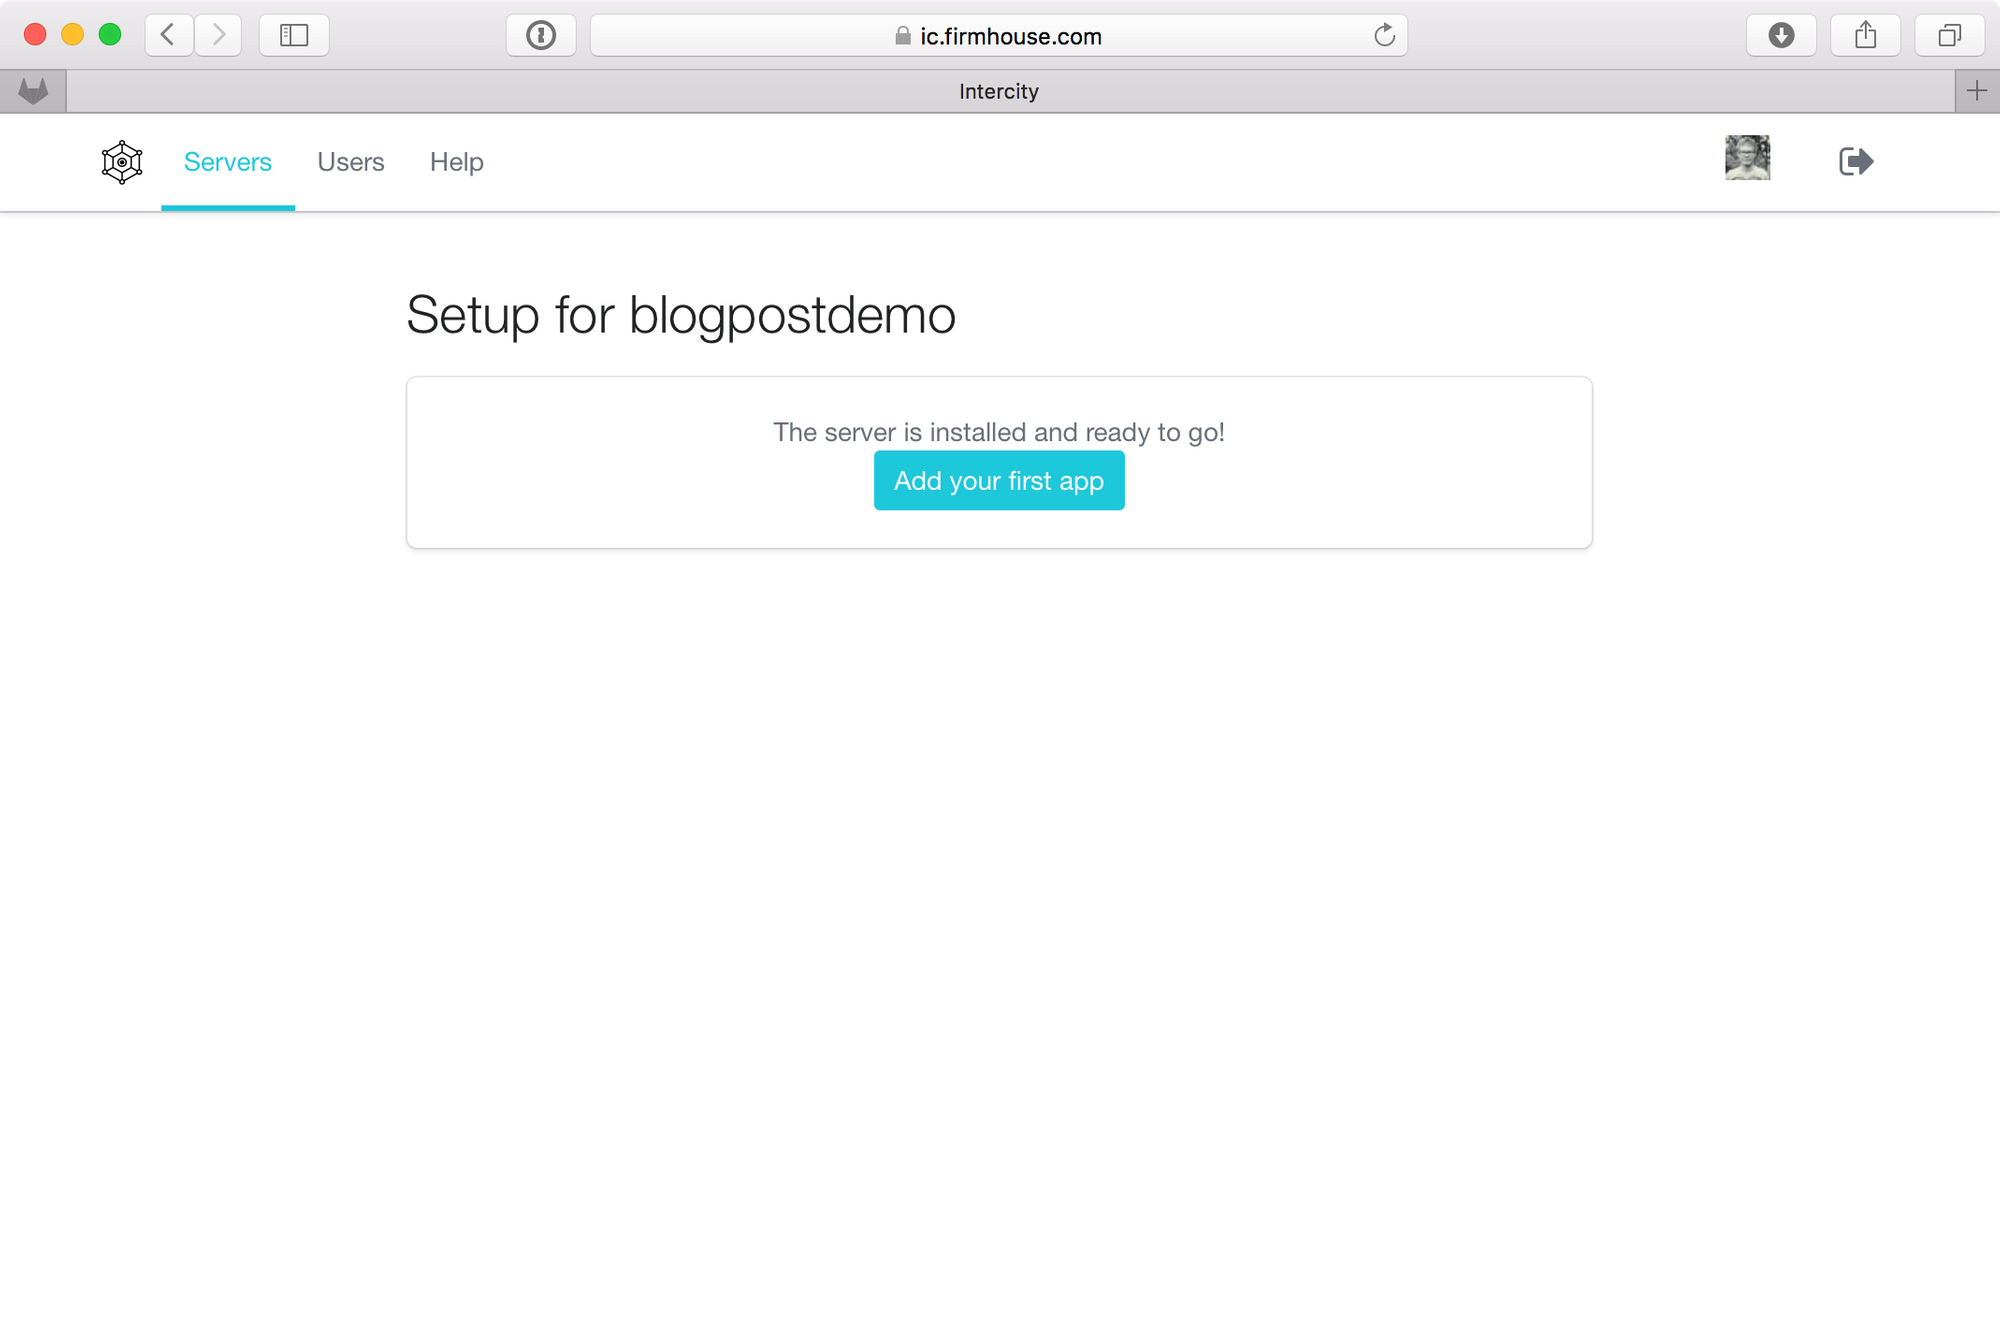
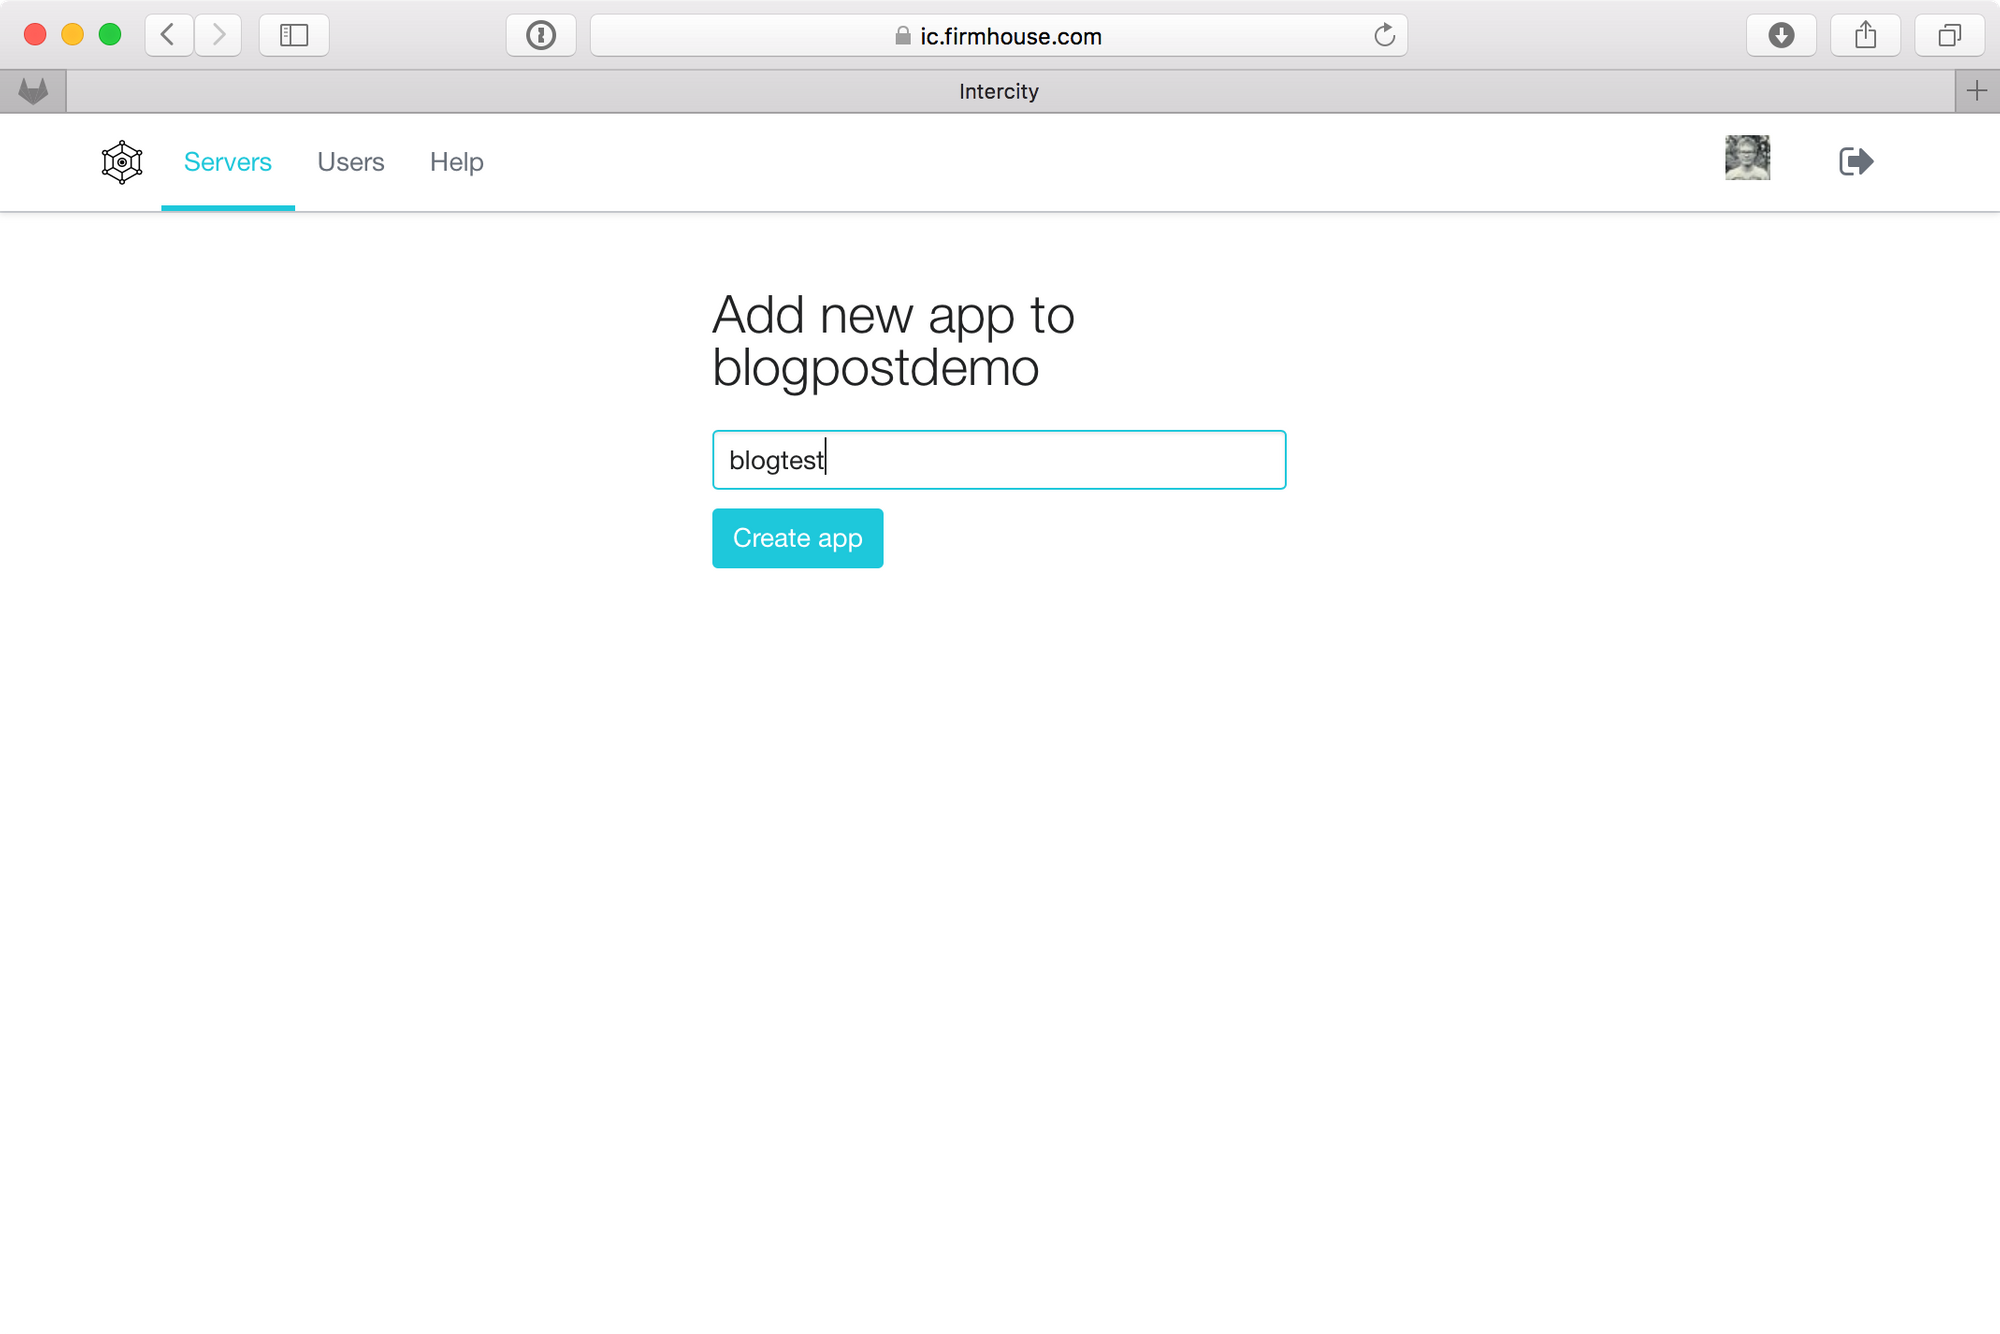
You can create your first app from the server detail screen. If there are apps present, this screen shows you the apps that are currently running. At this moment, there are no apps added yet, so I'm going to create my first app by clicking the "New app" button and entering a name for my app.
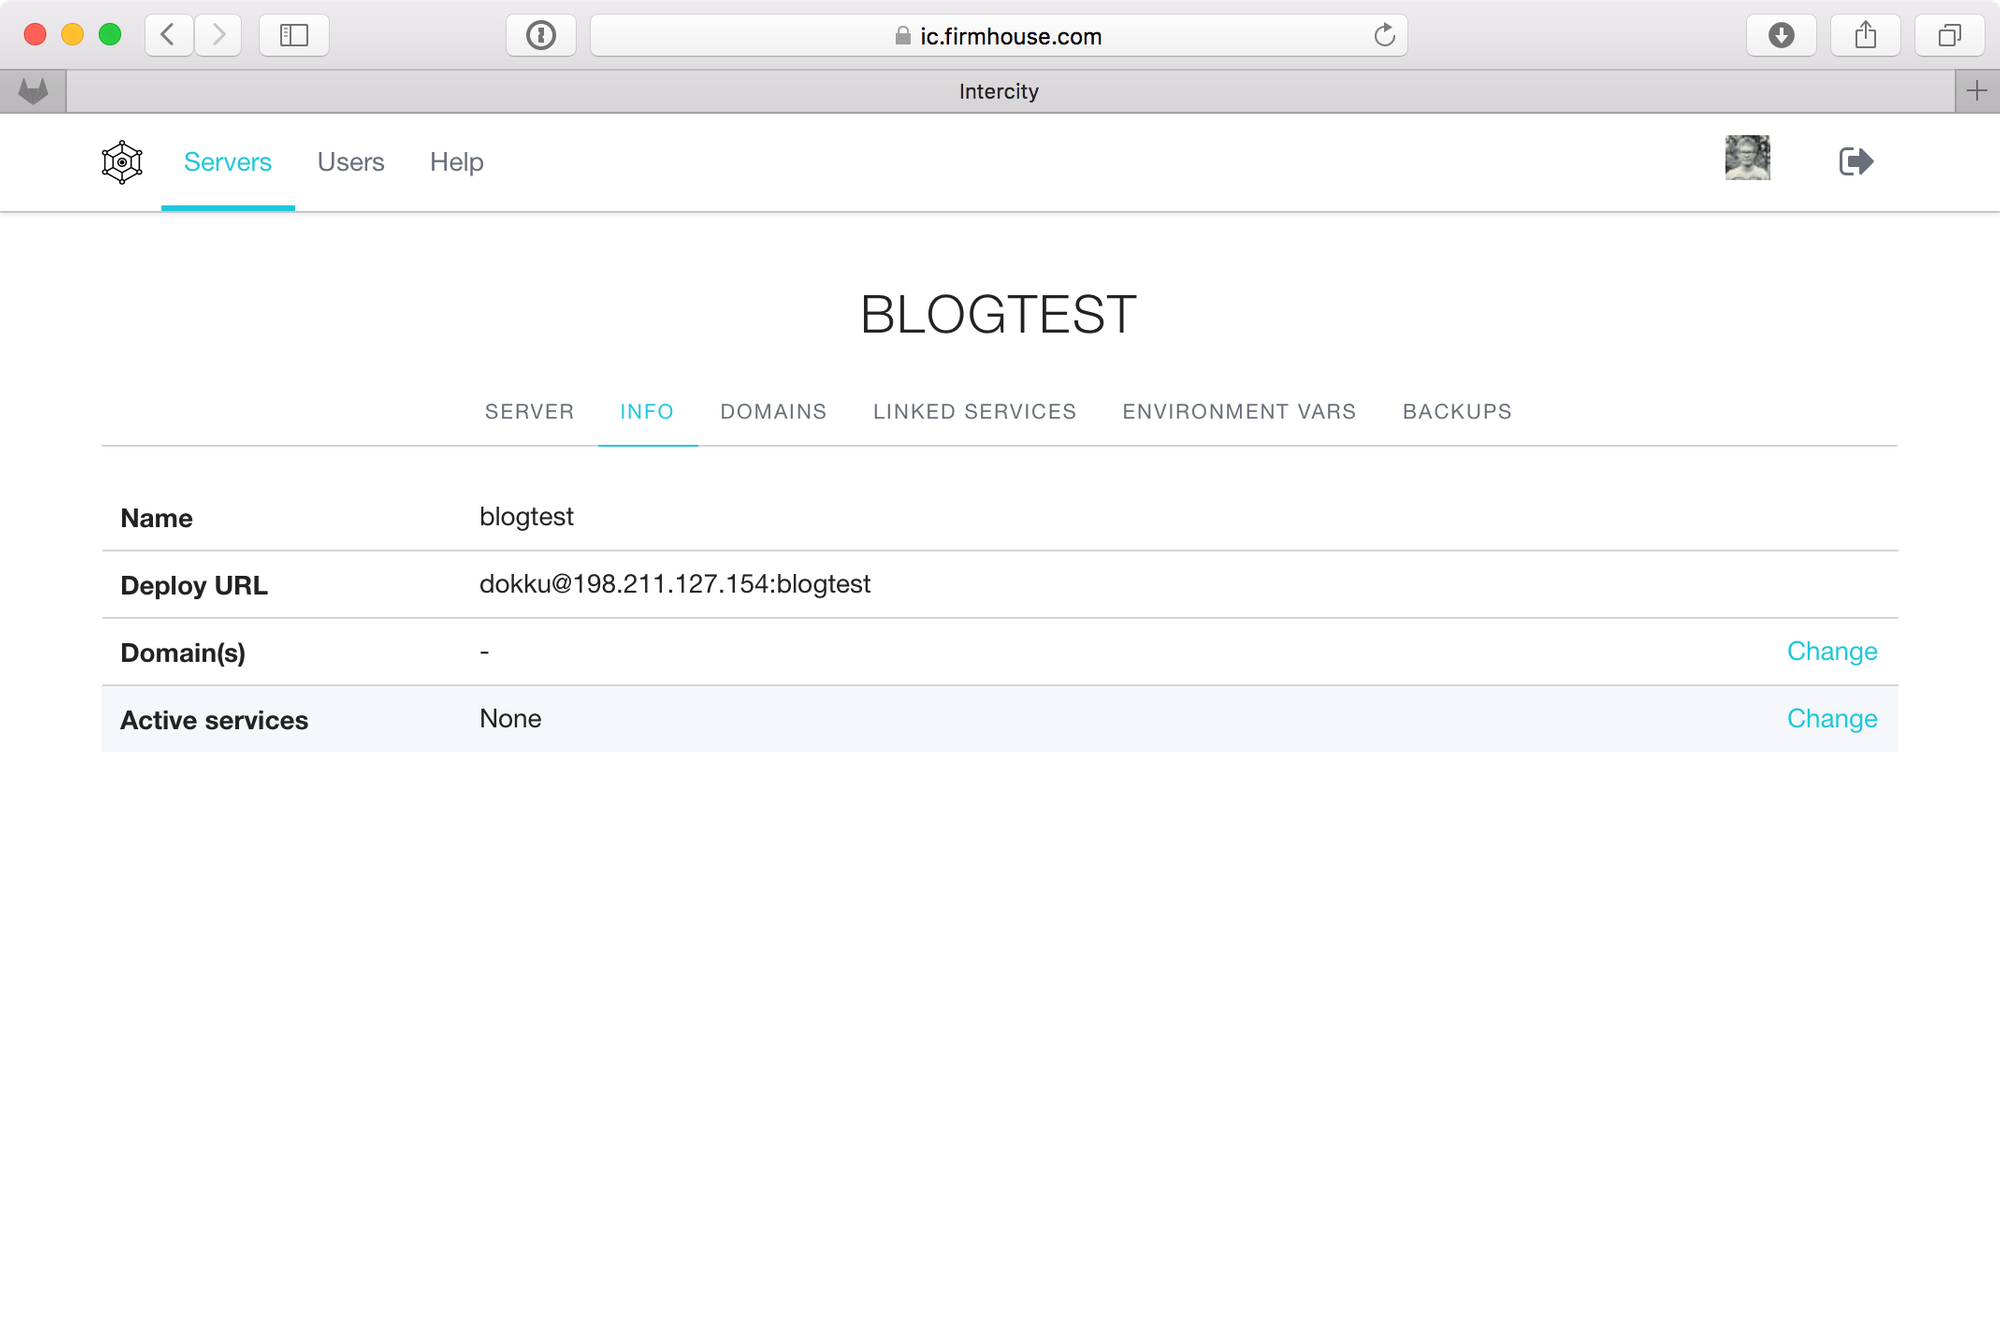
After creation, the app appears on the server's app overview screen and shows a few details on how it's configured.

Let's go into the app so we can configure the domain name, the database and deploy the app.
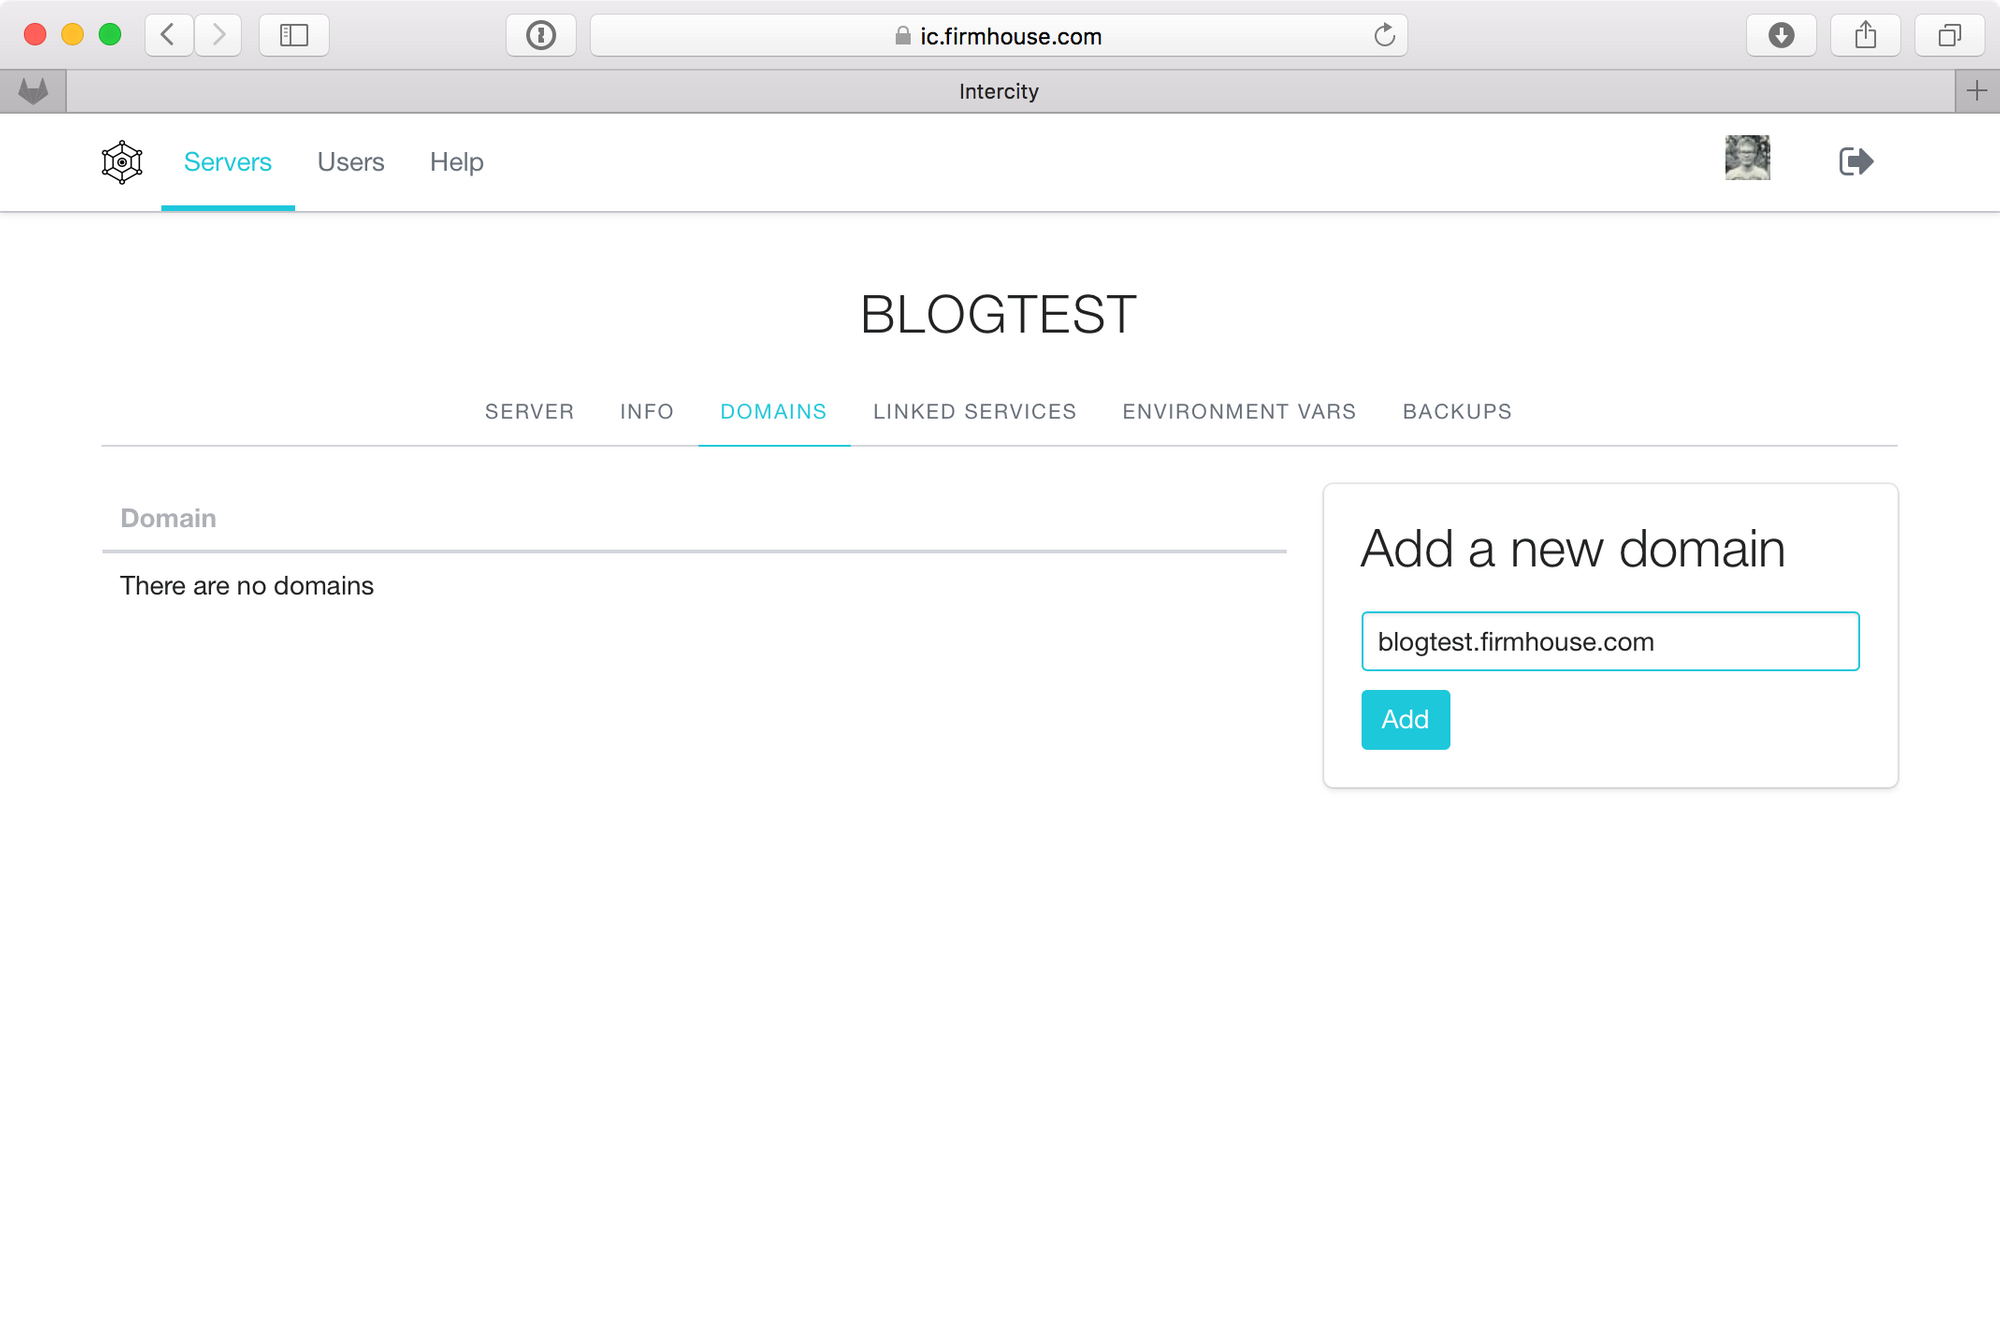
Under the "DOMAINS" tab we can add a domain name for our app:
To create a database for this app, I go into the "LINKED SERVICES" tab, which will usually show all services enabled for this app. Services are things like databases, search engines or caching servers. Because there's no service installed on our server yet, Intercity offers to go into the "Install a service" screen so you can install the first service on the server. We're going to add PostgreSQL to use as a database for our app.
Currently, Intercity features adding ElasticSearch, Memcached, MySQL, PostgreSQL and Redis to your server so they can be "linked" to your apps. We call this "linking" because services aren't run server-wide for all your apps, but every app has it's own service instances. When you install a service on your server, a base package is downloaded from the Docker repository. After that base package install, you can "link" a service to an app, which will start up an instance of the service, specific for your app. Having per-app services gives you full flexibility and security.
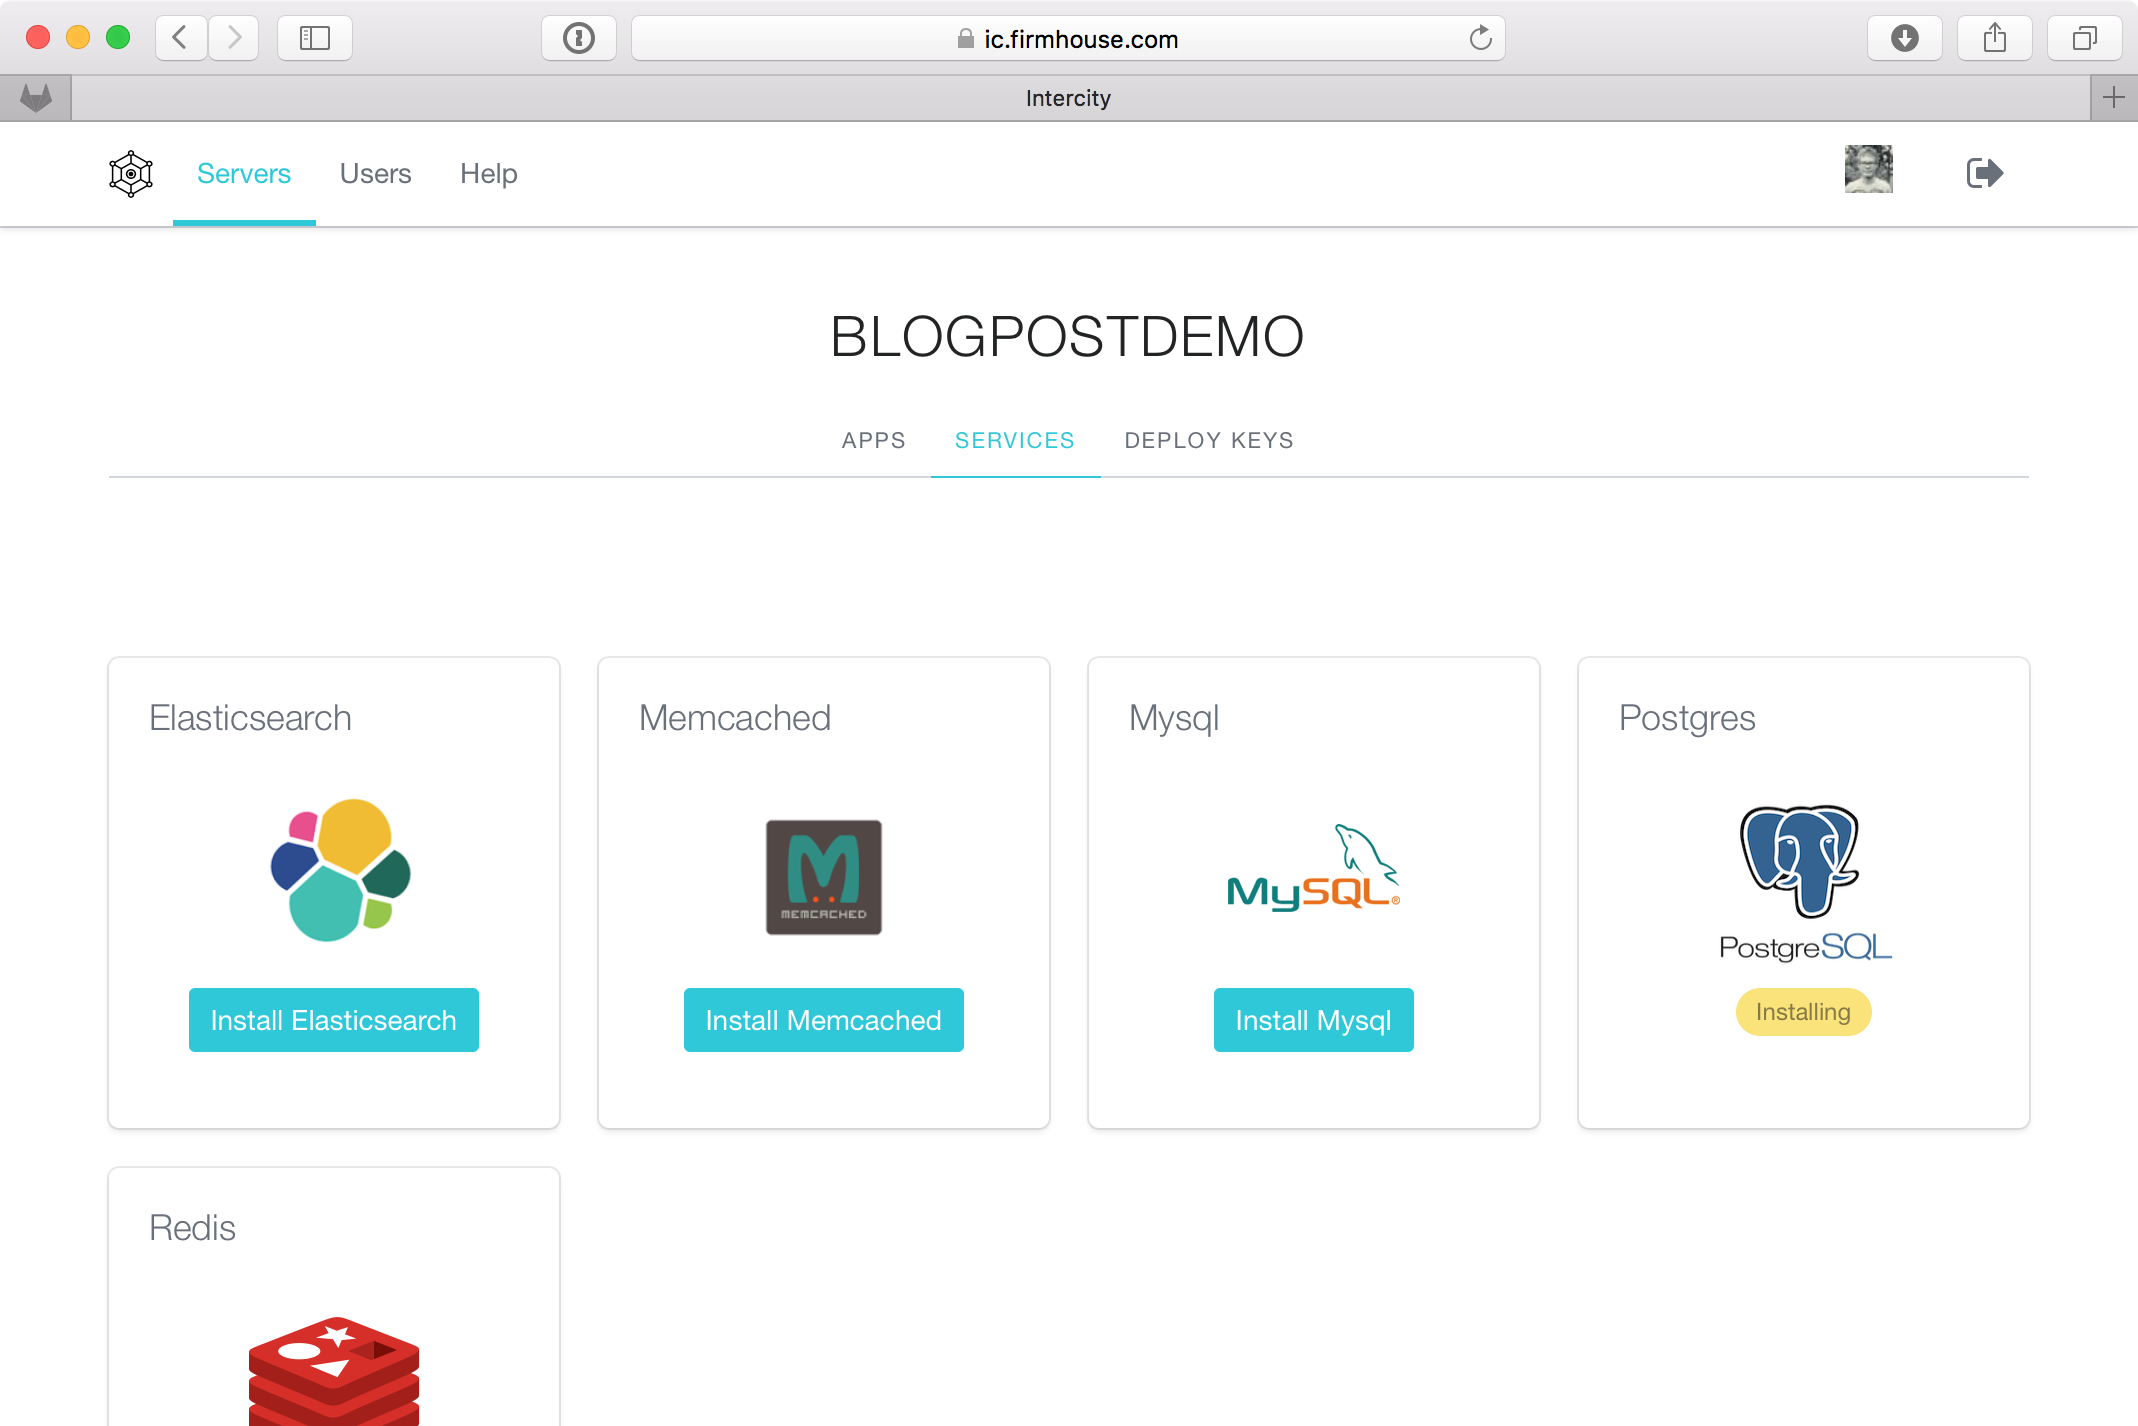
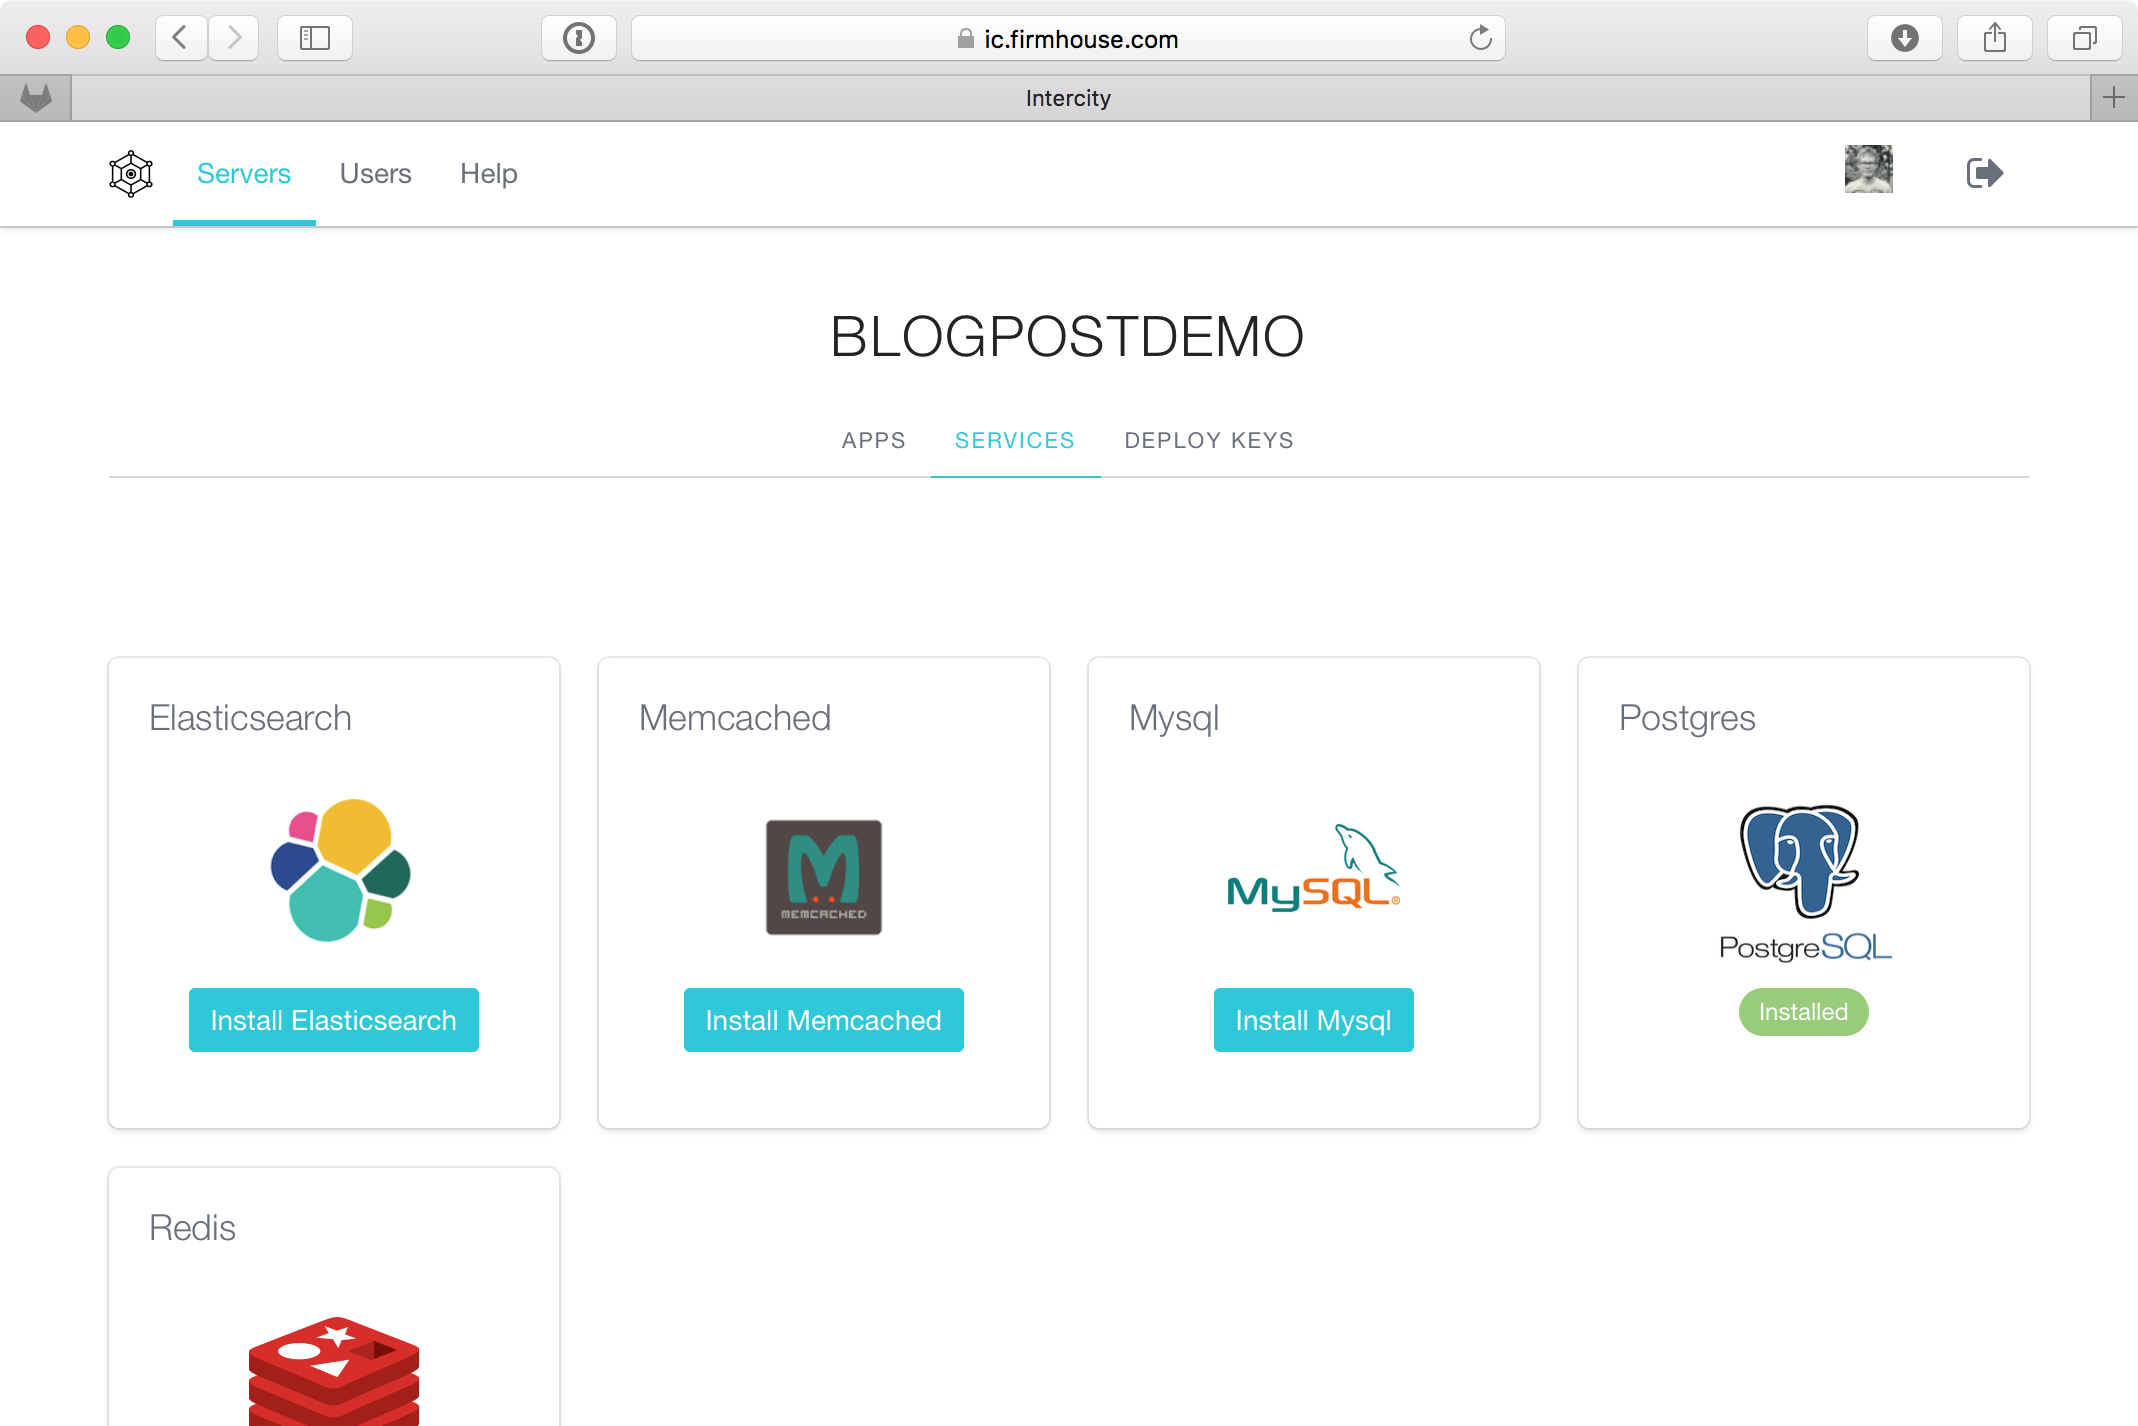
I'm going to install the PostgreSQL service. The button will change to a yellow label "Installing" and when the base image of the service as been pulled down, it will change to a green "Installed". The green label means that the service is ready to be linked to any apps on the server.
Now on the app's "LINKED SERVICES" tab, the PostgreSQL service is available to be linked and can be enabled for the app using the "Link Postgres" button. Clicking the button will configure Postgres for the app I've just created. Meaning: it will start a new PostgreSQL server and create a new user that it will configure via the DATABASE_URL environment variable. In turn, Rails will pick that up and connect to the Postgres database! No extra configuration necessary.

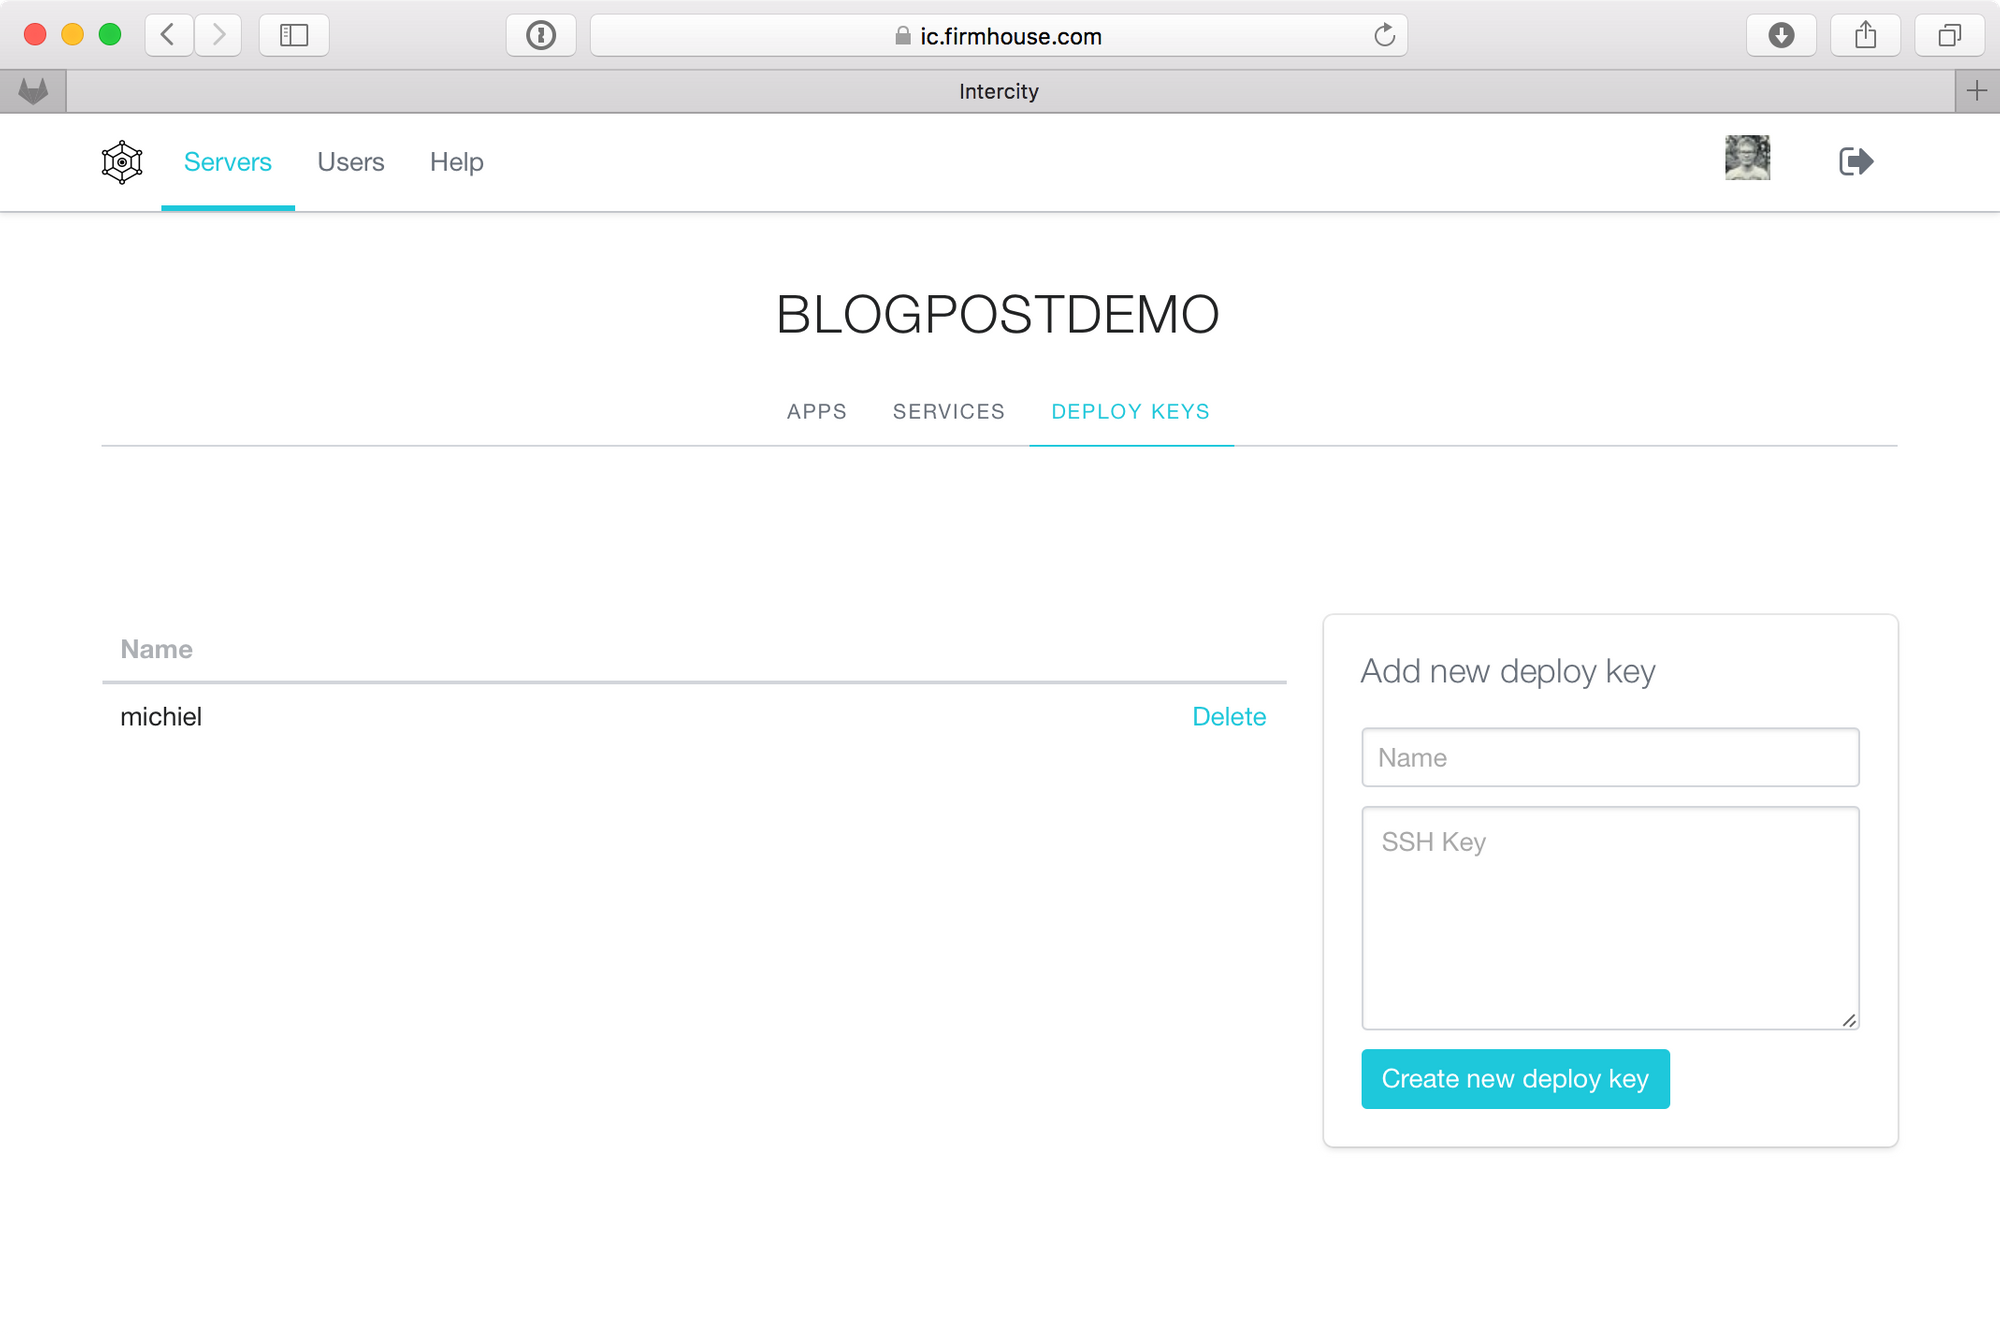
I'm now almost ready to deploy my app! The final thing I have to do is add my SSH public key to the server, so it will give my local machine permission to deploy:
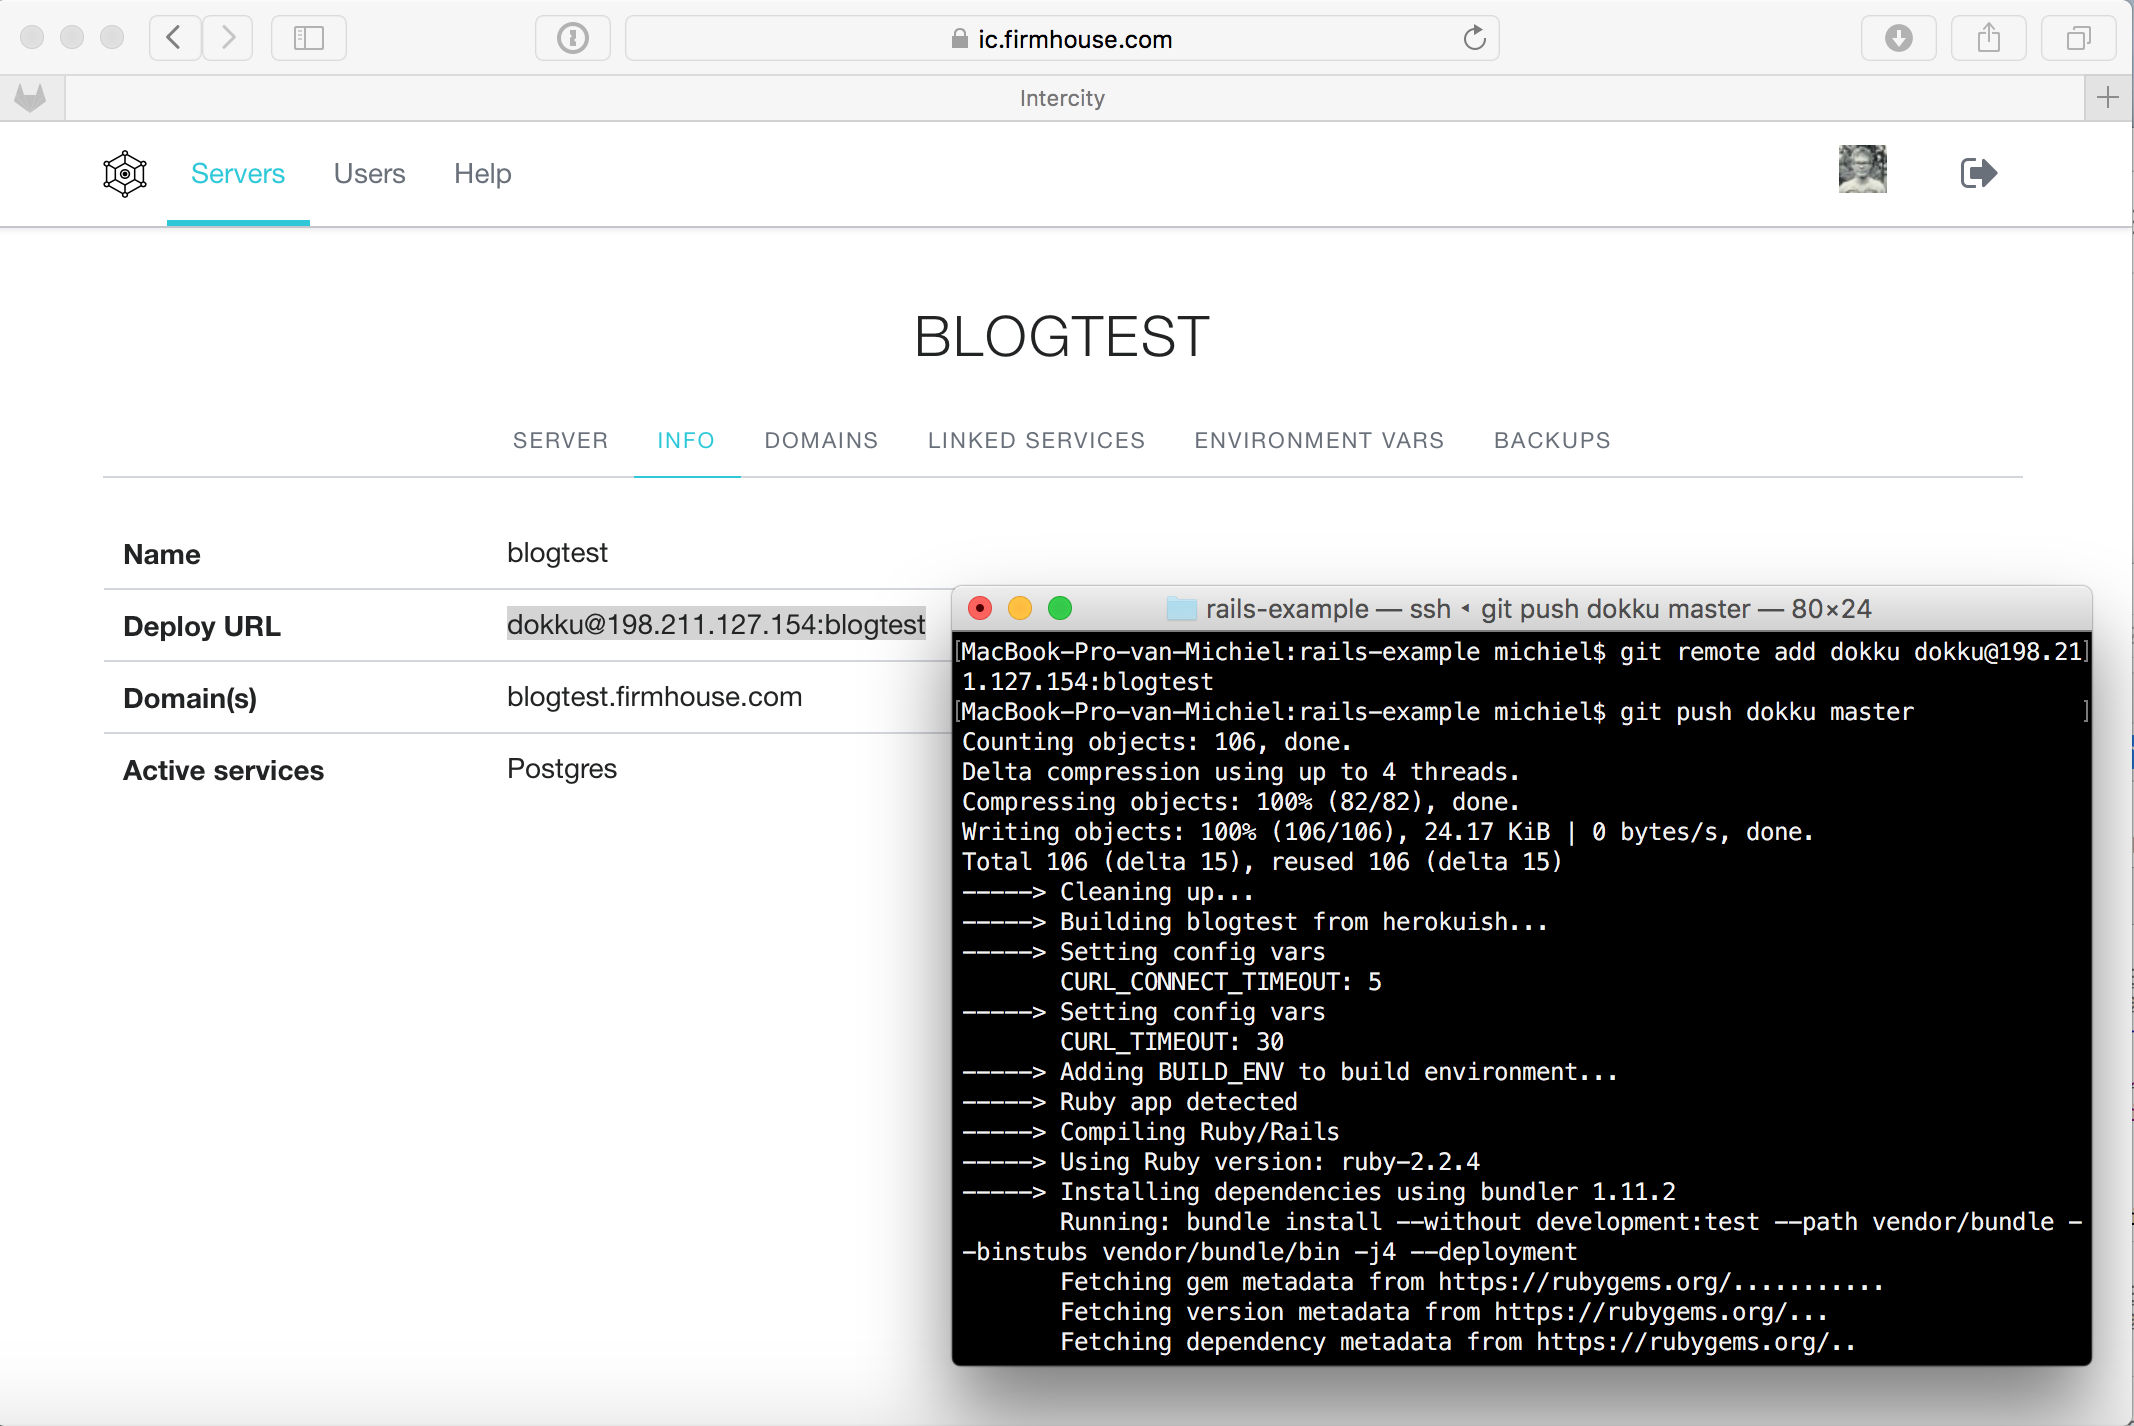
I am now ready to deploy my app. All I have to do is add the "Deploy URL" of my app as a git remote to my Rails app, and push to it's master branch:
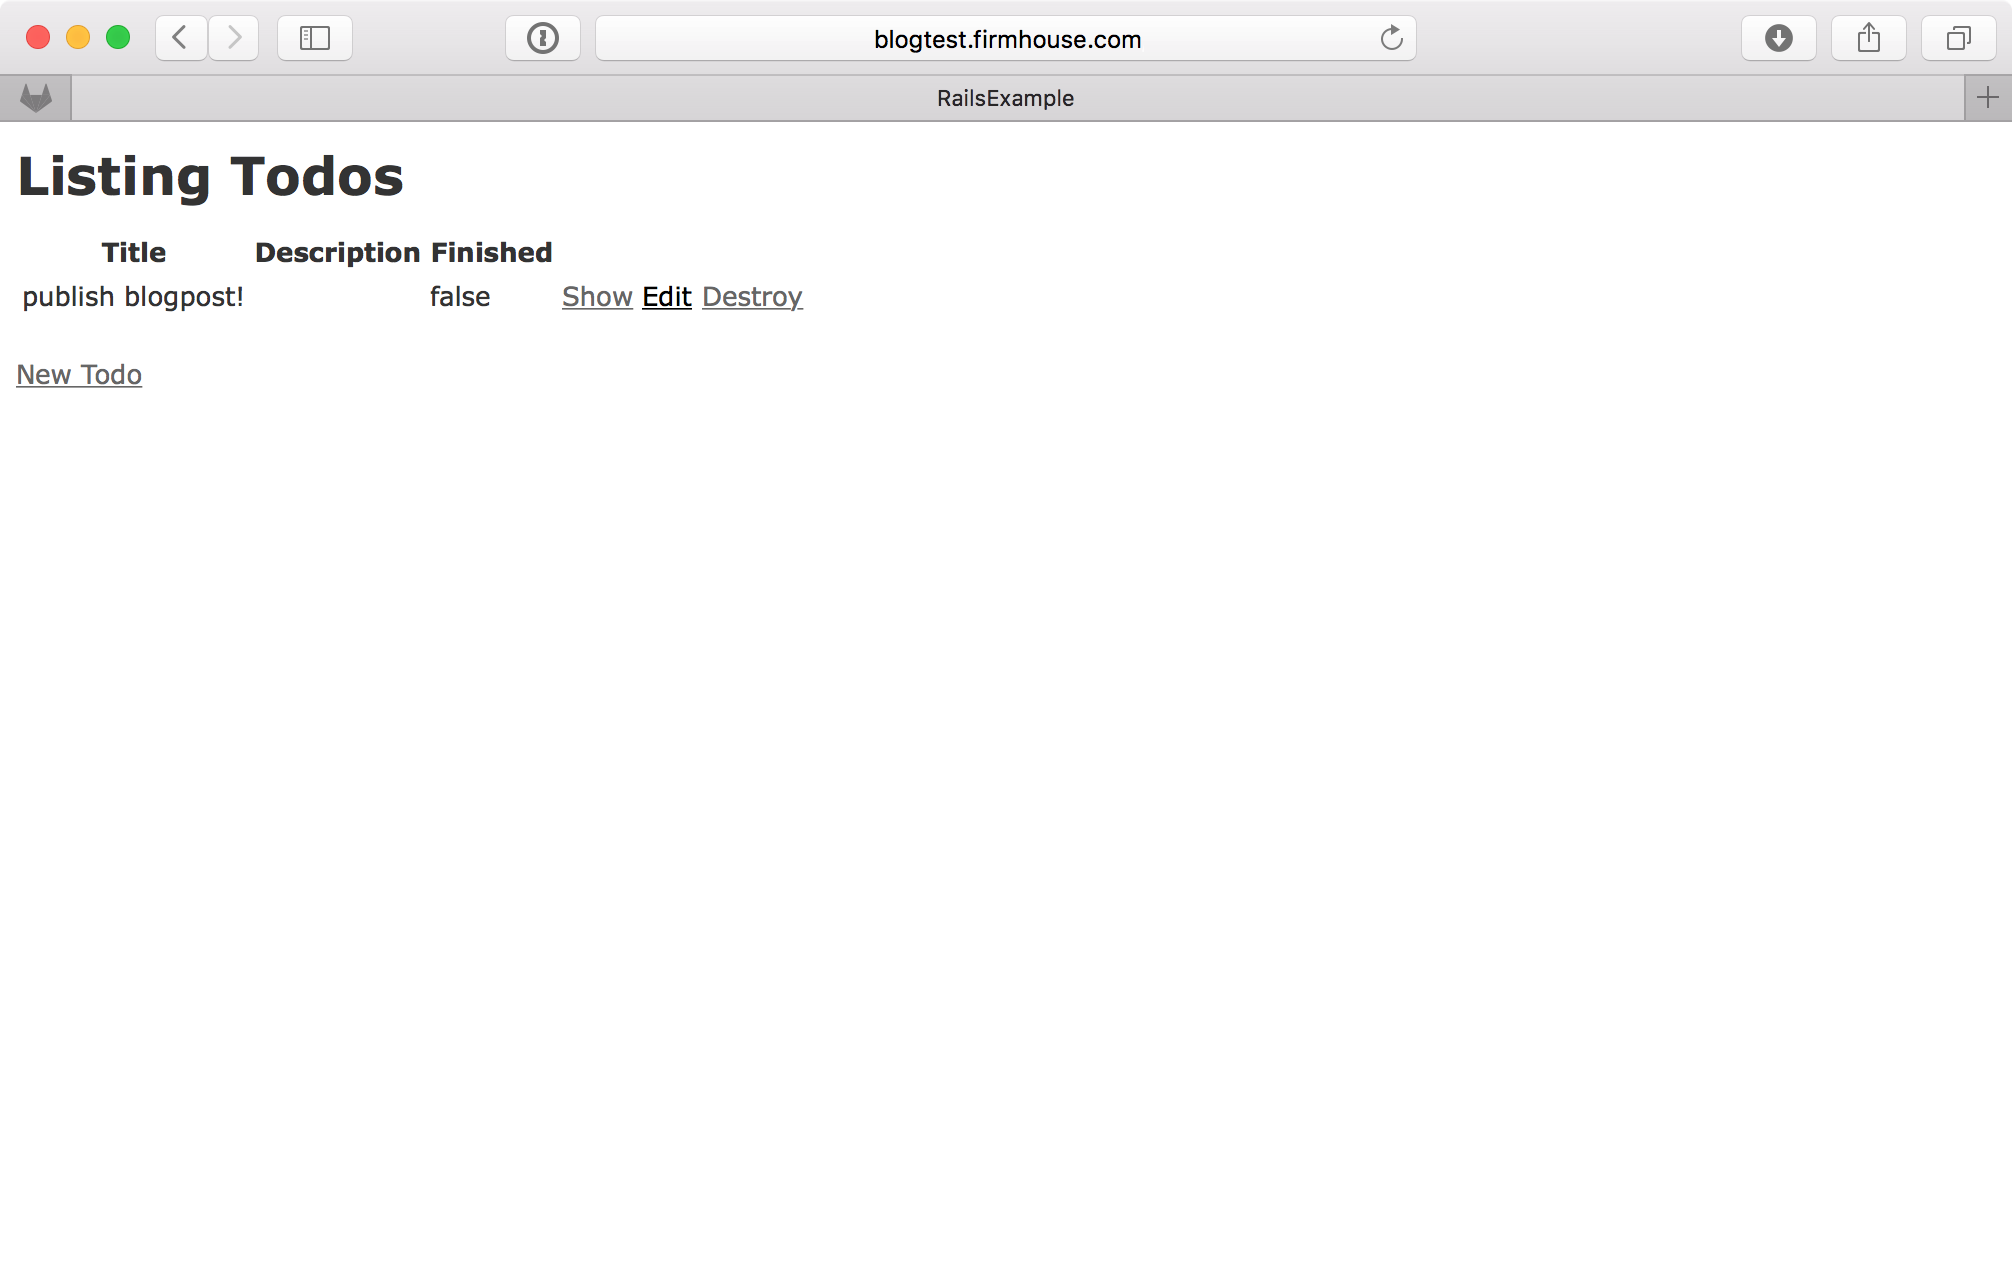
And here we are. Our brand new Rails app, deployed to my instance at DigitalOcean:
If you would like to host your apps, head over to the Intercity Website and follow the install guide. This guide will explain how to install the Intercity management dashboard on your own server. It only takes a few commands to do so!
Did you enjoy this post? If you have any questions or comments, please let me know! You can reach me on Twitter via @michiels or send me an email at mailto:michiel@firmhouse.com.